


How to Light and Shoot a Perfect White Seamless Background
Today I'm going to write a post for those who are wanting to create a white seamless background. Whether you want a full-length portrait or a white space for product photography, a white seamless background will help eliminate a lot of hard work in photoshop and make your subject pop! This is a lot of fun for portraits of kids and I use it all the time when I have commercial and product shoots.
For starters, if you're looking for a white backdrop, read my post about taking simple portraits (the LAST paragraph) to find an affordable setup. You can get a backdrop and stands for a good price on amazon. If you don't want to spend the money, I'm sure there are a lot of great DIY tutorials using a white sheet for a backdrop!
My tutorial involves three lights; two to light your backdrop and one to light your subject. You can rent lighting kits from most camera stores and they are pretty easy to use. If you own your own lights and have been wanting to figure this out, hopefully I can help!
Here's a diagram of my setup:
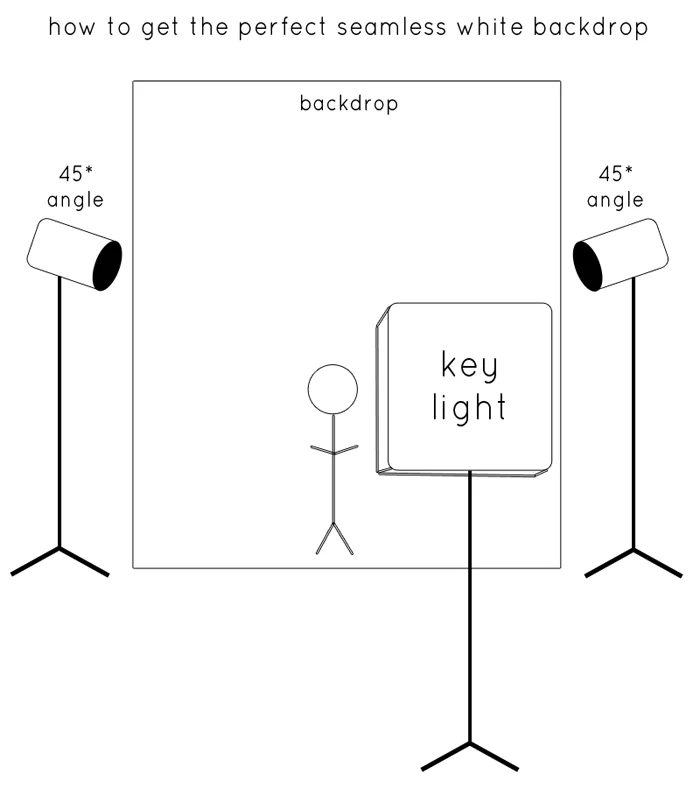
To get a white backdrop it's helpful to have TWO lights lighting it. Set up the two lights that shoot at about a 45 degree angle onto your backdrop. It's important to keep the light on your background but not on your subject. I use the general purpose reflector that attaches to my strobe to help direct the light (see below).

If it's too strong, I use something like black paper or tape as a grid to help diffuse the light that's shooting on the backdrop. IDEALLY, a Barndoor like this below, is the best way to control the light but I tend to make things work without buying a ton of equipment!

For my key light, I like to use a big rectangle Softbox when shooting quick portraits. It keeps light soft and nice and it's easy to move around to light my whole subject. I usually place it so it is shining down on my subject at a slight angle.
Next, you'll want to plug the lights in, turn them on and connect your camera to one of the strobes using a PC sync chord (usually included in most lighting kits). If your camera doesn't have a PC terminal where this connects, you can buy a simple adapter like this one. You can also ask the store if they rent those as part of the kit. I also use a wireless syncing remote that connects to my camera's hot shoe and the other half stays connected into my sync port on my strobe. This is a nice advantage because you can move anywhere you'd like and not worry about having your camera plugged into a chord.
Set each strobe so that it will fire using the optical slave switch. This will automatically have it fire when the strobe you're connected to fires. I had three lights firing at the same time, while connected with the PC sync chord to only my key light.
At this point, I have to play around with my exposure to get my subject lit just how I envisioned. It helps to keep your subject a few feet away from the backdrop, to avoid too much light spilling onto your subject. Also, most strobes match daylight, so set your white balance to the daylight setting to keep it easy. For my images I shot at f/5, 1/250 of a second and kept my ISO at 125. All three of my lights are strobes, meaning they fire for a split second.
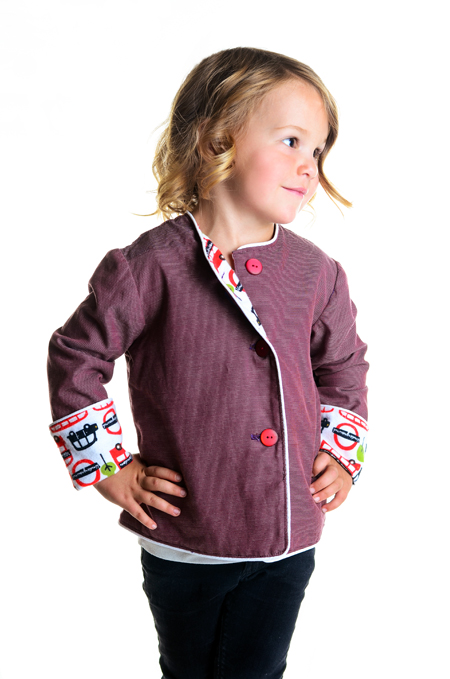
The last step is to play with the strength of each strobe until the light is how you want it. The two lights on your backdrop should be the same values to keep the backdrop evenly lit! Every kit is different, so it's trial and error to get the perfect value to light it just right. Play with the dials until it looks right. The same goes for your key light, or main light lighting your subject. Be careful not to light your subject too bright, just keep it nice and even.
Here's an example of how easy it is to overexpose with your key light. The top image is a little too hot; little Sophie starts blending into the background. By toning down my key light on the second image, I'm able to still keep the full detail in her fur.


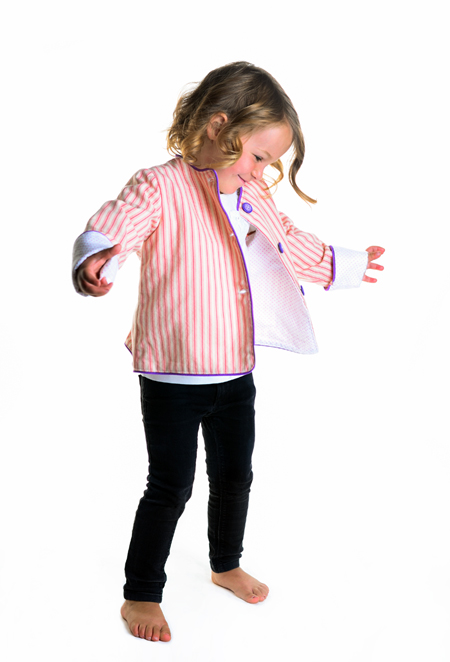
Strobe lights are fun to use because you can get great catch-lights in your subject's eyes.

If you want to ask any questions visit my contact page and I can walk you through it! Try making a white backdrop and get some fun shots!

My Top 5 Recommended Canon Lenses Under $600
Earlier this month I posted my top 5 Nikon lenses and now it's Canon's turn! If you are wanting to add a few lenses to your arsenal and you shoot with a Canon DSLR, check out my recommendations below. Please note that both of these articles are geared towards those who own a cropped sensor (for Canon, an APS-C) camera; if you own a full-frame camera (such as the Canon 5D Mark iii), you should be well on your way to understanding lens selection and will be in a whole different budget ball-park. However, I do note that some of these are compatible for both camera bodies AND I give just a few options that are closer to the $1,000 range.
For those of you just getting started or wanting to find better image quality, here's a few lenses that can help!

Canon EF 50mm f/1.8 - Portrait/Fast Lens
If you're looking for a great affordable lens that can dramatically improve your photography, this is the one to start with. It's a no brainer at the price of only $125 on Amazon! I'm blown away at how great that price is; it is even $100 cheaper than the Nikon equivalent! With this prime lens (a lens that has a fixed-focal length or no zoom which means sharper images) you can get those beautiful blurry backgrounds or bokeh. If you've got a little more to spend and want to take it a step further towards great image quality and great performance in really low light settings, check out the 50mm f/1.4 for $349 on Amazon. Both of these lenses are compatible with Canon full-frame and APS-C DSLR cameras.
Canon EF 85mm f/1.8 - Portrait Lens
My good friend is a fantastic wedding and portrait photographer and this is her favorite lens. The extra focal length in the 85mm creates Bokeh that is absolutely beautiful. It is a great portrait lens! Once again, this is a fixed/prime lens and will offer sharp images with great quality. You'd be surprised at the image quality with this compared to your kit lens (if you have the 18-55mm lens)! This lens is compatible with Canon full-frame and APS-C DSLR cameras. Find this lens for $369 on Amazon.
Tamron AF 28-75mm f/2.8 - Everyday Lens
Okay if we were talking perfect lenses here, the next option of an 'all-around, every-day lens' might be the Canon 24-70mm f/2.8 L. BUT that lens costs FOUR TIMES the amount of this Tamron lens! The reviews about it are all over the place; it is a great lens, especially at the lower price. It's not as heavy and well-built as the Canon L lenses, but it is well made and the image quality is pretty dang close. To have a versatile lens that offers a good zoom range AND the ability to shoot in low light with that lovely f/2.8, that's a pretty happy thing. This one is worth looking into. Get it for $499 on Amazon. If you have the budget and want to find the next best 'walk-around' option, one of the greatest is the Canon 24-105mm f/4 L lens that goes for $999 on Amazon. Photographers love the reasonably fast aperture, a great focal length and very sharp images.
Canon EF 70-200mm f/4L - Telephoto Zoom Lens
If you need more zoom than your everyday lens, this telephoto lens is a great buy. The f/2.8 version is $600+ more than this version, but the consistent aperture of f/4 even at it's maximum zoom is a good thing to have. The image quality of this L series lens is awesome; it yields sharp images, has fast focusing and is lighter than the more expensive versions. Keep in mind that this lens will be fantastic for well-lit settings such as outdoor sports where you can plan to use a fast shutter speed. Find it for $599 on Amazon. This lens is also compatible with both Canon full-frame and APS-C cameras.
Canon EF-S 10-18mm f/4.5-5.6 - Wide Angle Lens
This lens is a great intro lens for wide-angle photographing (such as landscapes or interiors). It is also at a great price of $279 on Amazon. This lens will only work on an APS-C camera, not full-frame. At the top of our price line is another option, the incredible Canon EF 16-35mm f/4L wide angle lens ($999 on Amazon). Photographers rave that this lens boasts even greater image quality and sharpness than the 16-35mm f/2.8! If you're serious about landscapes or real estate images, this will give you a lot of bang for your buck.
As always, be sure you consider your subject matter and then your budget to find out which lens is the next best choice for your camera bag. I hope these options can send you in the right direction for improving your photography! So much of it has to do with your lens. Don't forget that!
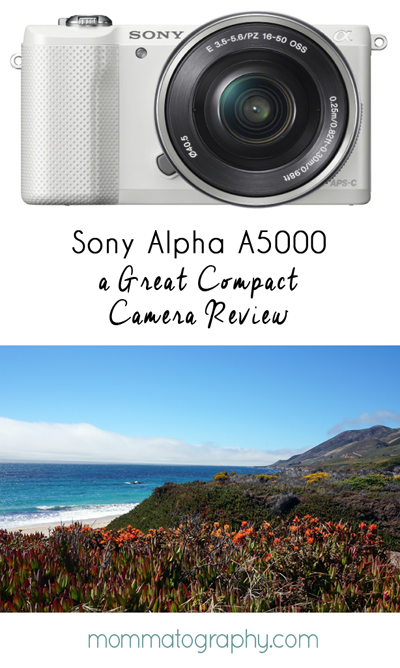
Sony Alpha A5000 - Review of a Compact Mirrorless Camera
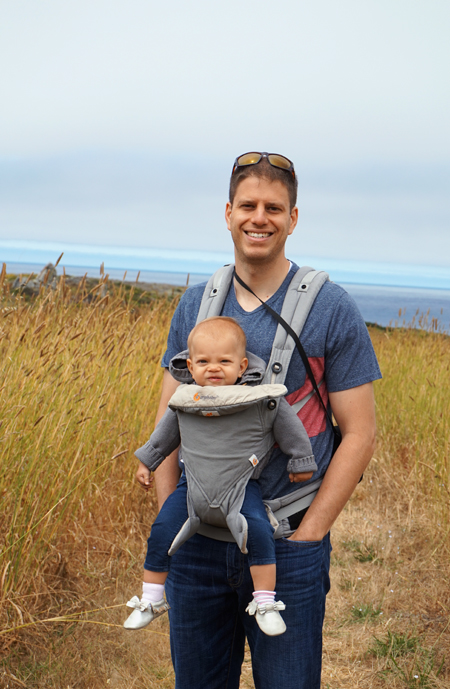
Who wants a great camera but doesn't love the idea of hauling around a heavy bag full of lenses and a big' ol DSLR!? If you're in the market for an easier on-the-go option, today's post is for you. We're going to hear from another Mom who happens to be my lovely sister! She has sent me photos from this point-and-shoot camera and I am impressed. I never really LOVED previous point-and-shoot cameras I owned, so my first thought about them was always a big "no thanks"! Her experience with her Sony is definitely changing my mind. Check out her opinion and user review of the small but powerful Sony Alpha A5000.
Hi! My name is Aarika and I wanted to share with you how much I have LOVED my Sony Alpha A5000. We got it for three hundred somethin' from Best Buy on Black Friday a couple years ago. It usually retails for $450 so we scored a good deal.

What I love MOST about it:
It is smaller than a standard DSL-R camera so I take it everywhere in my purse all the time. I know sometimes people get really nice expensive cameras and they hardly use them because they're bulky and hard to lug around. That's why we settled on a mirrorless camera.
Although it is smaller, it has a great lens. I think the lens and camera quality give it the ability to take really great pictures that exceed the quality, depth and interest of a standard point and shoot.
I use it on auto (always) and get great photos.
I LOVE the videos it takes. The focus on the subject and the blurred background make the videos so interesting and beautiful.
It has an awesome share feature where it can send photos and video right to your phone or computer.
Although I don't own any other lenses, I like the idea that I could change out the lens if I ever became more interested in photography.
We purchased the three year warranty that covers drops, spill and loss and that gives me such peace of mind (especially having young kids).
ALL the point-and-shoot cameras we used prior to having the sony never captured the kids in motion! So many shots were blurry. This camera can take pictures mid-sword fight that are clear and show the expression and detail of their faces (I usually I use the flash in those moments and am pretty happy with the outcome)!

Cons
I did have a hard time finding the right sized case for it and ended up buying one from a British seller on eBay which has been perfect!
My camera seemed slower to start up when I would turn it on after a year of owning it. I called SONY and learned the reason was that I needed to reformat my SD card. After doing that it is it back to it's usual snappy self.


To read more about mirrorless cameras, check out this great article. Here's a quote from that article explaining the benefit of mirrorless cameras:
"Mirrorless cameras are interchangeable lens cameras that don't have the mirror and optical viewfinder that define a DSLR. In most other respects, they're extremely similar: with only a few exceptions, most mirrorless cameras these days are built around the same sized sensors as DSLRs, increasingly have similar lenses available, and can offer the same image quality."
If you're looking for a compact camera that quality-wise still packs a punch, the Sony Alpha models are definitely worth looking into! Check them out!
My Top 5 Recommended Nikon Lenses (Under $800)!
So you've had a Nikon camera for some time now and you're getting a little bored with the kit lens it came with. You want a new lens or two, but where do you even start? Today I'd like to get you headed in the right direction with some lens recommendations that hopefully won't cost much more than you paid for your camera body. It can definitely be a SHOCK to discover how expensive lenses can be.
Check out my top five lenses (okay, I mentioned seven :) for APS-C sensor cameras, or DX-format lenses, under $800. If you aren't sure what kind of camera you have, do a quick google search to find out if it's a crop sensor (DX) or a full-frame (FX). If you want to learn more about the difference between a crop vs full frame camera, read my article here. It's VERY important to know the difference when buying a lens.
1. Nikon's Nikkor AF-S DX 35mm f/1.8 or Nikkor AF-S FX 50mm f/1.8. I grouped these two lenses together because they are similar focal lengths and are perform similarly. Both are very sharp and allow you to shoot in low light. The 35mm lens will allow you to get closer to your subject (about a foot) and the 50mm requires about a foot and a half from your subject, so not quite as close. I like having a little more distance from my subject with my 50mm; it also gives me a little more bokeh (blurry background). The 50mm lens will be compatible on a full-frame camera, should you choose to upgrade your camera body, but the 35mm is not. Both are very affordable! Get the 35mm for $197 on Amazon. Get the 50mm for $216 on Amazon.

2. For a telephoto/zoom lens I recommend the Nikkor VR 70-300mm f/4.5-5.6. This lens will give you a great range to zoom for wildlife, your kids sporting events, distant landmarks or landscapes while traveling. This lens is more affordable because it doesn't have a really low maximum aperture, but the Vibration Reduction will help you shoot at lower shutter speeds (to let in more light) without having blurry images. Other zoom lenses with a lower maximum aperture (such as f/2.8) can be $1,400 or more! Get this zoom lens for $497 on Amazon.

3. Wide angle lens - Sigma 10-20mm f/3.5 is a great choice! I own this lens and have loved it; for landscapes and interiors it has been awesome. Distortion is common among wide-angle lenses, and this one handles it well; distortion is minimal. Having the constant f/3.5 aperture lets you shoot wide open in low-lit settings, even zoomed in. It is well built and a good price for $449 on Amazon.

4. A great all-around walk-around lens is the Nikkor 18-200mm AF-S VR II. This lens is great for everyday photography, travel and will give you the right amount of zoom you need in those scenarios. The Vibration Reduction also helps create sharper images. Get it for $596 on Amazon. If it's in your budget and you don't need quite as much zoom, the fast Sigma 18-35mm f/1.8 DC HSM lens is a great replacer for your 18-55 kit lens. It has much better quality and can shoot in low light very well. Get that lower f/stop to let in more light on this lens for $799 on Amazon.

5. If you are serious about portraits, the 85mm f/1.8 lens is beautiful. It is a fast lens to let you shoot in low light, and you'll get that great bokeh (blurry soft backgrounds). This somewhat telephoto fixed lens puts your subject farther away from you, but fills the frame and blurs the background. Get it for $477 on Amazon.
