How to Take Better Photos With a Samsung Galaxy Phone
I have to admit I am a bit of an iPhone snob, and my 'phoneography' (aka phone photography) articles have definitely been biased towards iPhones! I was curious about Android devices and what they were like, so I borrowed a friends' Samsung Galaxy S4 to see what it could do! Today I have a few tips for taking better photos with an Android device; specifically, the S4. If you don't have the S4, don't stress; I'll have more Android photography tips coming!
Learn what mode your camera is set to, and what other modes it has to offer.
This S4 offers an HDR mode, which means high-dynamic range. If you like images that have saturated colors and a lot of contrast, try shooting in this mode instead of adjusting your settings manually. You can also shoot panoramic images, erase things out of the backgrounds, shoot in sports mode to better freeze motion and more!
Shoot using your manual settings!
In some situations, shooting on auto works just fine. You do have the very cool option of choosing manual settings such as your own ISO, selecting your white balance, and using exposure compensation. See my examples below to help you find where to change these settings!
1. Underneath the camera icon, you can change your ISO. Remember that the higher the number the brighter your photo will be. If it's a dark scene, choose a high ISO number.
2. You can also change your metering modes. Read my article about metering modes to better understand the difference between center-weighted, spot and matrix metering!
3. Under the settings icon on the right, you can change your white balance, set timers, and use exposure compensation. If you aren't loving your auto white balance, select a certain setting that matches the lighting you are in and see if it helps!
4. If you click 'Exposure Compensation' underneath the White Balance setting, you'll see this slider (image below). Sliding to the left will make your exposure darker, to the right will make it brighter. This is an easy trick to change the exposure quickly!
You have a built-in spot removal tool!
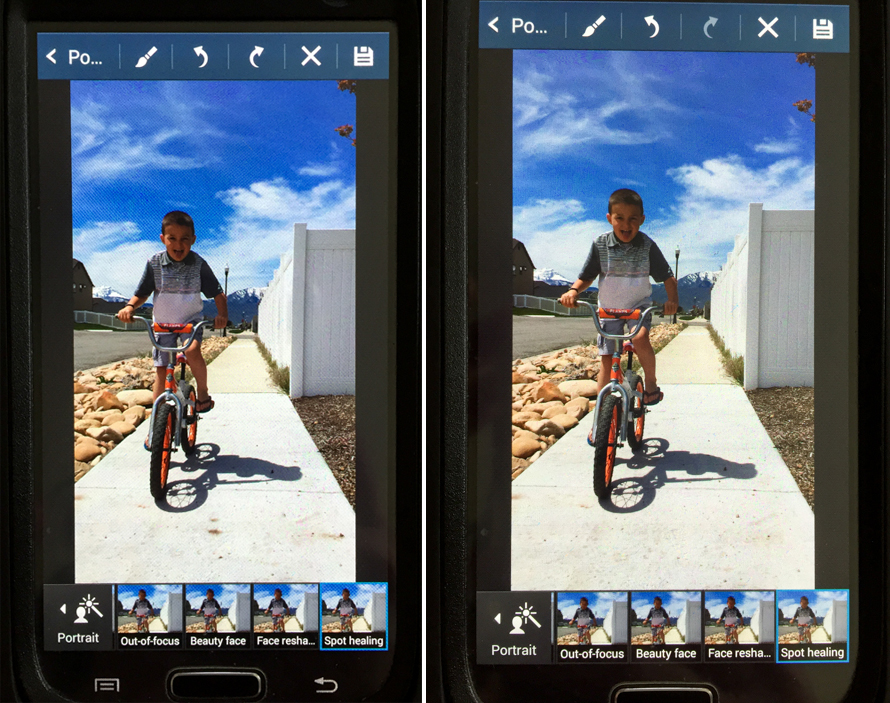
Is there something you really don't like in your photo? Simply drag your finger around the object (or photo-bombers face) and this tool will get rid of it! I love that they have this feature.
Check out the difference between the dirty sidewalk on the left, and after the spot-removal tool was used on the right to clean it up!
Check out your auto-face brighten tool!


