Think More About Lenses, not Just Your Camera Body

Are you still confused about which lens to buy and why it matters so much? Is it hard to stop thinking about that brand new Canon camera body you want to badly? Stop for a minute, read my article and hopefully you'll understand why it's the lens that matters most when taking photos. 

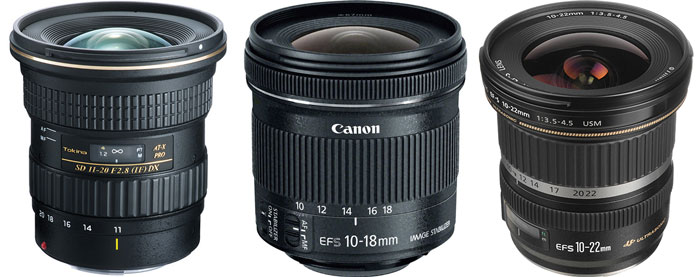
photo by www.photographybay.com

I've said it probably more than once, but I'm going to say it again; DSLR camera bodies these days are SO GREAT. You could spin in a circle and point to one at the store and be happy with it! Even bodies that were new 2-3 years ago are still GREAT. The difference is made when you are using a good lens. What do you need to consider when choosing a new lens? 

  • FOCAL LENGTH

  • MAXIMUM APERTURE

The focal length of your lens is the mm of length it offers. For example, the 18-55mm kit lens your camera most likely came with, zooms in and out from 18mm - 55mm. A 50mm lens is FIXED; it offers one focal length, doesn't zoom and that's that.

The maximum aperture means the lowest your f/stop # will go on your lens. Every lens has a limit to how 'wide' it can open up to let in light. For example, on that 18-55mm f/3.5-5.6 lens, at 18mm (zoomed all the way out) your f/stop will not go past f/3.5. At 55mm (zoomed in) your f/stop can only go to f/5.6. Lenses that offer larger maximum apertures, such as f/2.8 or f/1.4 will be more expensive, because they let in more light and are more versatile. If your budget can afford it, a lens with a larger maximum aperture is always a good choice! Unfortunately, they can get quite expensive. 

Something to Think About: 

  • Fixed lenses are good quality and offer SHARP images and a lot of the time, let in more light allowing you to take photos in lower-lit settings. About that budget? You can get a Canon 50mm f/1.8 lens for only $125! The Nikon 50mm f/1.8 is $216.95

  • Zoom lenses will allow you to zoom in and out on subjects without physically moving, but have moving parts so they aren't quite as sharp as FIXED lenses. 

Ask Yourself These Questions:

  1. What do spend most of my time photographing? What is my subject matter? 

  2. Which is more important, image quality or having an all-around lens with the ability to zoom? 

  3. What is my budget for gear? 

Once you determine what style or look you are going for, what you will be shooting and how much you have to spend, you will be ready to narrow down your lens selection and find one that works great for you! If you photograph products, food or take portraits, the 50mm fixed lenses mentioned above are an AWESOME addition to your camera bag, at a low price. Having that lower maximum aperture will change your photography! 

If you want MORE about understanding lenses, head to my article here about understanding lens selection!


What do YOU Want to Learn More About?

Alright you ladies (and gentlemen)! It's time to hand the cards over to you. I would LOVE to open a little request line to see what YOU want to learn more about. Do you have specific questions about your camera? About editing tips? Lighting? How to improve photos you take with your phone? How to take better pictures of your kid at a sporting event? What gear to get? 

I want to hear from you so I can better help you improve your photography skills. Think about one thing that frustrates you, one thing that is holding you back; let me know if I can write a post for you to help you out! 

Okay, this isn't a phone (request line...) or even a computer, but it is a pretty dang cute old TV right? I loved it. I did a film project shooting for an ad agency a few years ago and hunted down old vintage forms of communication. It was a blast! Can you believe how thrilled people must have been when this little tiny box came out? Think of us now with our eighty inch glossy screens hanging from our walls...

Well, I don't have one of those but we've sure come a long way :)

Here's a secret about me: I LOVE shooting film. I have a medium format camera and it's my favorite camera, hands down... BUT I'm a busy mom, life gets expensive and I've used lame excuses to not shoot film very often. I honestly lose sleep at night thinking about that camera sitting in my bag downstairs... I know I love it and it's time to take it out. 

Back to the Q&A. Seriously though, don't hold back! Head to my contact page and fill out a quick form, write me on Instagram or Facebook - anything works! I love helping people get closer to their photo goals; let that be YOU! 

Thanks for following! I love you all! 


Photography Cheat Sheet Part Two

I loved how many of you enjoyed my first printable photography cheat sheet, I decided to make another one! This free photo cheat sheet is directed toward troubleshooting. I have easy solutions to help you improve your photos IN camera. For instance, what settings to change if your photo is too bright or too dark. 

These easy tips will help you get better photos! Simply print this card and stick in your camera bag so you can remember what to do while learning manual mode. Check it out!

Click here for the free 5x5 printable. 


Quick Tips for Taking Great Outdoor Portraits

Whether you're new to the whole portrait gig, want tips for taking better photos of graduating Seniors, or just want to improve on portraits overall - today I'm going to give you a few pointers to have a successful portrait session! 

This is my beautiful friend Cali that I knew growing up in Hawaii, who recently graduated from college and happened to be my latest subject for a portrait session. If you are going to shoot outdoors, my first tip is regarding LIGHTING.

  • Choose to photograph your subject when during the "sweet light" (just before sunset). I love shooting late in the evening when the sun isn't blaring hot and bright; it softens your subject and creates a nice glow. I also love shooting BACKLIT, placing the sun behind my subject. This can create fun sun flares, or just a really beautiful glow. 

  • It's key to get your subject comfortable; most people don't love to be smiling in front of a camera and can appear stiff and out of their element. Chat with them, make them laugh, create movement; do anything to make them feel confident and relaxed.  It will show! 

  • Remember to get the eyes in focus. There's nothing more disappointing to a good photograph than realizing the subject's eyes aren't tack sharp. If you have a shallow depth of field (a small aperture/very blurry background) take your camera off of Autofocus and use your toggle button to land your focus point right on the eyes. For more on sharp photos and directions on how to do this, head to my article here.

  • Mix up your angles and have your subject in various poses; sitting AND standing. I like to bring a simple stool or a chair to change things up, have them sit in the field, on a blanket, against a wall... anything to bring variety into the shoot. I also always ask women if they have a side of their profile that they like better to make sure they are happiest with their photos. 

The more options you have to show your client, the happier they will be with the end results. If they didn't like a certain angle and 80% of the shoot was stuck on that one pose, it can be a problem! If you are creative, keep things lighthearted and fun and have great lighting on your side, chances are you'll get some great photos. 


Free Lightroom Preset - The Perfect Black & White

To all my Lightroom users out there, I've got a gift for you today. I'm sharing my favorite preset for converting photos to black and white! Black and white conversion can sometimes be more complicated than you hoped for. It seems simple enough, but it's easy to overdo it and you're left frustrated with an unsaturated photo that says.... BLAH.  

This preset will be your new best friend. I use this ALL the time, especially for portraiture. It is light and keeps things subtle and natural; it is definitely my go to for black and white conversion and I love it.

Every so often I will use this preset and add slightly more contrast. Try it out and see how you like it!

Click here for the free Lightroom Preset! 

Instructions:

  1. Click the link to automatically download the .lrtemplate file. 

  2. Find the file that was downloaded and save it to your desktop.

  3. Go to your Lightroom window and find your presets menu on the left. Ctrl+Click (right click) on the preset menu and click Import (see the image below).

  4. Locate your file and press Import to upload it into Lightroom. Lightroom will store it for you, so you can now delete the file or save it as a backup!

Here's another example of how lovely this black and white preset is!

Have a HAPPY MONDAY! 

PIN IT!