


Shutter Speed - How to Freeze Motion & Show Motion Blur
The Fourth of July is one of my favorite holidays. I am SO excited for the 4th this year! There is such a fun feeling living in a somewhat small town; I love driving with my windows down past beautiful green fields and mountain lakes, listening to all the patriotic country songs and thinking about just how LUCKY we are to live in America. I love the BBQ’s, parades, the rodeos, and the fireworks.
I thought this would be a good week to learn more about good ol’ shutter speed! If you want to photograph cowboys trying for 8 seconds at the rodeo, freeze fun moments of your kiddos splashing in water, or capture the magic of fireworks, it all comes down to shutter speed.
For those of you wanting to learn how to freeze motion or show motion blur, this is an easy tutorial to help you get the perfect shot at the perfect moment.
How to Freeze Motion
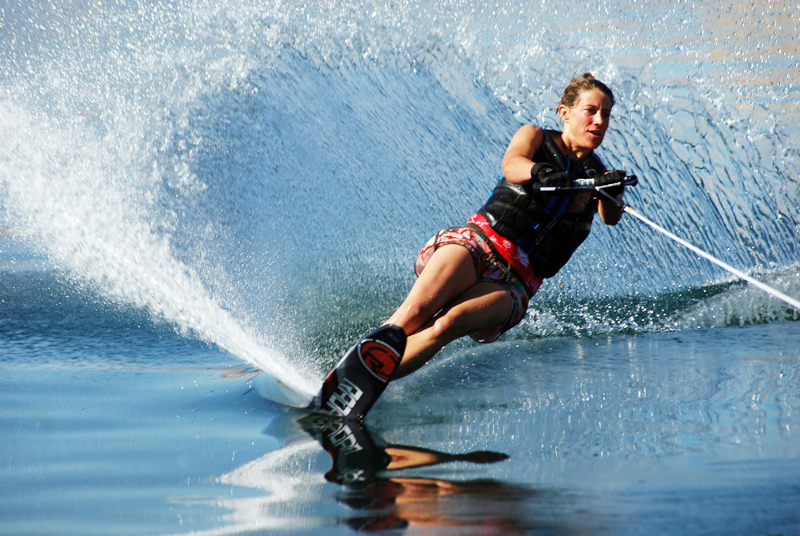
To freeze motion in a photograph, you need to use a FAST shutter speed. Shutter speed gets quicker the higher the fraction is. Going from 1/60 to 1/250 to 1/500th of a second means your shutter speed is quicker. If you want to be sure that you freeze a subject running or jumping, using a shutter speed of somewhere between 1/500 - 1/1000th of a second is a good idea.
I love freezing motion at one of my favorite places on earth, Lake Powell. We spent many 4th of July's on that lake! It's a lot of fun to get good action shots of water sports. For the skier, I shot at 1/750, f/6.7 and my ISO was 110.
For the wakeboard shot, my settings were 1/500, f/8 and ISO 100.
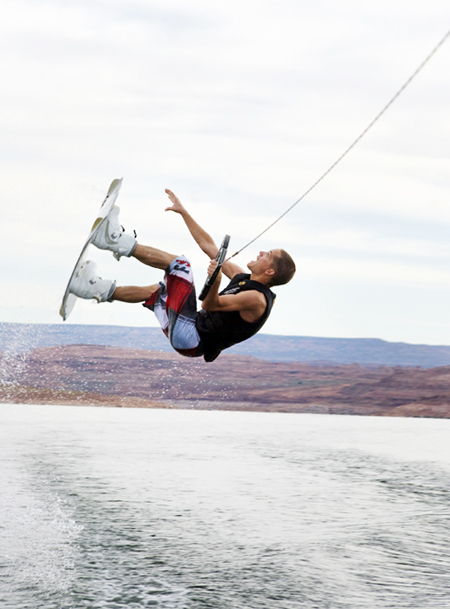
Wait a sec! That high of a shutter speed could be a problem right? Using a shutter speed that high means that you need A LOT of light. This can easily be done mid-day with the sun shining outside. If your lighting conditions aren’t bright enough, you’ll have to raise your ISO to a high ISO #, or open your aperture up as far is it can go (lower f/stop #). These are two keys to getting more light. Keep in mind that a lower f/stop will limit what is in focus and give you more background blur.
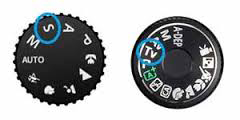
Are you bugged or overwhelmed by more manual settings talk? It's okay! I get it. Here’s another solution: change your camera settings to shoot in shutter priority. That way you can pick your shutter speed, and your camera will help you out with the rest. Phew. It's that easy!
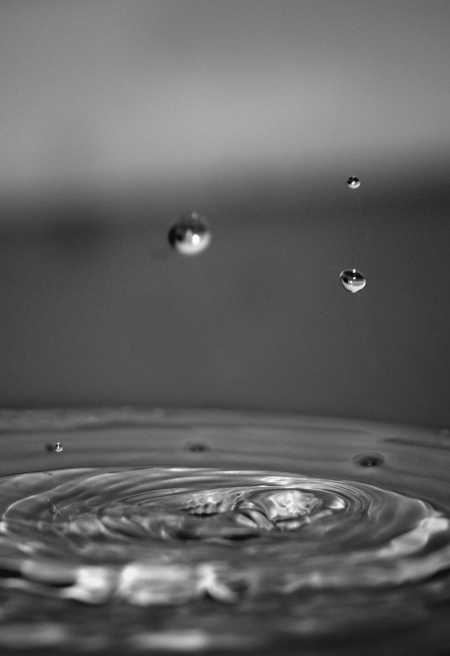
I shot this photo below at 1/1250 of a second and it's still not tack sharp! It's a fun shot but sometimes it's a lot of trial and error until you get the perfect shutter speed.

Here's another fun photo of freezing water in motion, taken at 1/600.
How to Blur Motion
Blurring motion is the exact opposite idea. To show movement or motion blur, you’ll need a longer shutter speed. This will be a slower amount of time, such as keeping your shutter open for 1/4th of second, to perhaps three minutes or even longer. Your camera records what it sees in that amount of time, thus showing any movement.
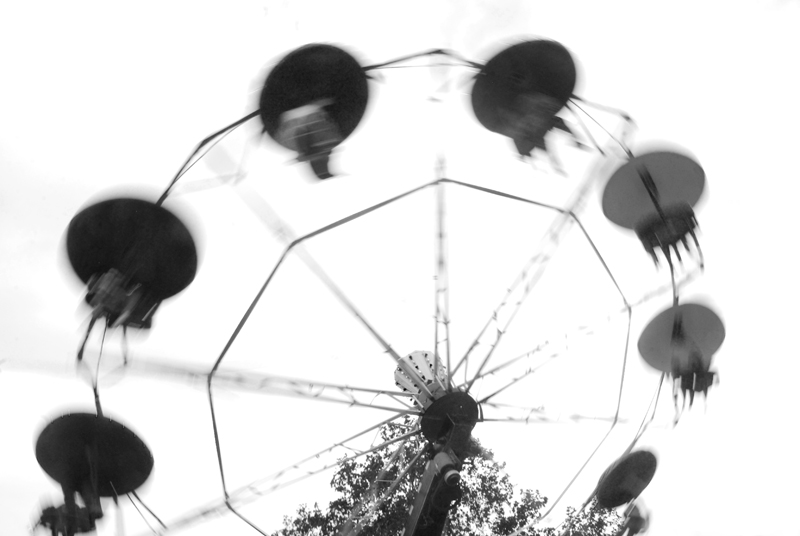
For this image below, these were my settings: 1/40, f/22, ISO 400. Because the ride was moving fast enough, 1/40 of a second was just long enough of a shutter speed to show the movement. Had I changed it to three seconds or longer, the shapes of the seats and the people would be a complete abstract blur. I chose this shutter speed because I wanted it to still be recognizable.
First, you have to think about how fast your subject is moving. Second, think about how much light is in your scene. If you have a long shutter speed on a bright sunny day, your image will easily be overexposed (SUPER bright). If you only use a somewhat longer shutter speed at night (like 1/15th of second) you may not have enough light in your scene and it could be underexposed or DARK.
If you try to show motion blur but your image is too bright, change your ISO to a LOWER # (less light) and your aperture to a HIGHER f/stop # (less light will enter your camera). If that’s too complicated to balance, once again switch to your SHUTTER PRIORITY and pick the longer shutter speed that you’d like to try out.
Two ways of blurring motion are:
1. Keeping your camera totally still and having your subject move.
2. Moving your camera (also can refer to the term panning, which is a fun trick we'll talk about later)!
To show your subject moving, it’s a great idea to use a tripod to ensure that you won’t shake your camera while taking the shot with a longer shutter speed. If you hand-hold your camera and try taking a two-second exposure, your photo will show camera shake from your hands moving. If you don’t have a tripod, you can try setting your camera on a table or anything stationary, set a self-timer and release the shutter. Even the motion of pressing your shutter release button can cause camera shake!
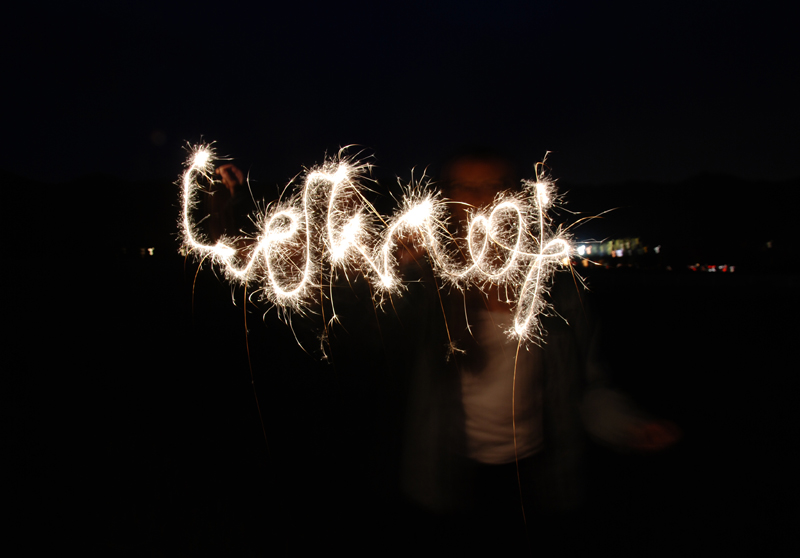
I didn't have a tripod for this photo and you can see that his figure is a little fuzzy and blurry. It would have been much better result if I had a tripod.

I shot this photo below at 1/10th of a second, f/4.8 and ISO 320.

Using a tripod and a long shutter speed, you can get some fun images with sparklers by light painting; simply waving your hand around while the camera is taking the photo.
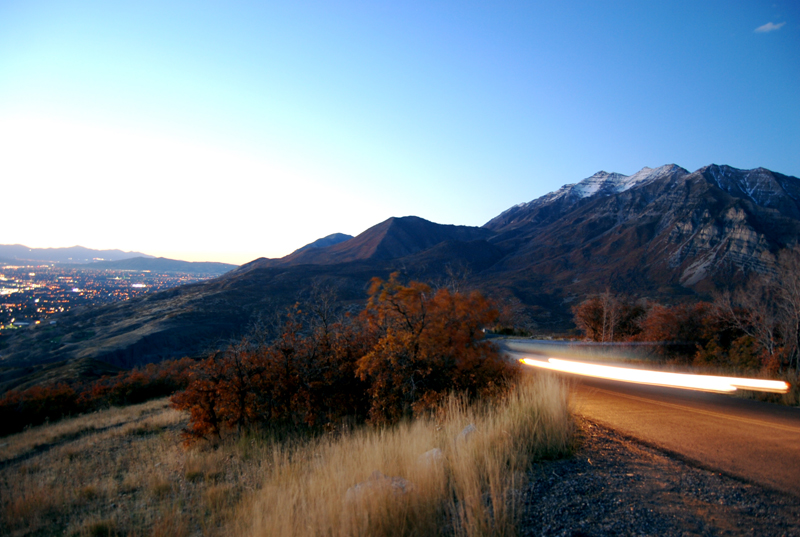
For the shot below, I captured the movement of car lights by shooting at 1/10, f/3.5 and ISO 100 and of course, used a tripod so the rest of my image was clear.
Use this holiday weekend to play around with your shutter speed and see what interesting images you can create! Be creative, have a tripod handy, remember SHUTTER PRIORITY and have fun!
Printable Photography Cheat Sheet
Let's take a break from editing tips and get back to some basics! Today I made a really convenient printable photography cheat sheet for those wanting a little guide that can fit inside your camera bag! This is a 3x5 card that you can carry and refer to easily on the go. When you want to know what settings to use in certain situations, just snag your card to help you remember what all those crazy settings will do to your image. It can be easy!
Keep practicing shooting manual, or choose your aperture priority to practice selecting your own aperture. That's always a good place to start; you only have to think about half of the equation because your camera will choose your shutter speed for you!
Click here for the full 3x5 file.

Processing Raw Files
If you missed my post last week on Shooting in Raw vs. JPEG, be sure a read it through. It will help you understand this post a little better. SO now that you understand the difference between shooting in Raw vs. shooting in JPEG, what do you do with all those Raw files?? Here's a few pointers to get you going in the right direction for converting Raw files.
If you shoot with a Canon camera, your camera should have come with the DPP (Digital Photo Professional) software disk. You can install this software to your computer, find the folder of your RAW photos, and export them as JPEGS. To save them in a different format go to File - Convert and Save. You can also batch process them (convert the whole folder all at once) by going to File - Batch Process. That window will let you choose where to save them, what to name them and select your quality. Play around with this software if you don't want to spend more for another post-processing program.
If you shoot with a Nikon camera, you can process your NEF files using the software that came with your camera; this is most likely View-NX or View-NX 2. Here's a tutorial on how to convert Raw files with this software.
If you are using a Mac, you can edit Raw files in Photos (the new version of iPhoto). When you import Raw files into iPhoto, it will automatically show your photo as a JPEG version. To access your Raw file you have to click 'Edit' to edit the image. After that, under the image menu, you have to select 'use Raw as original'. Once your edits are saved, it will show as a Raw file.
Google had a program called Picasa which was FREE and can also process Raw files. They have since discontinued Picasa, but if you have it downloaded already, you can still use it. For detailed instructions on how to convert Raw files to JPEG files using Picasa, check out this tutorial.
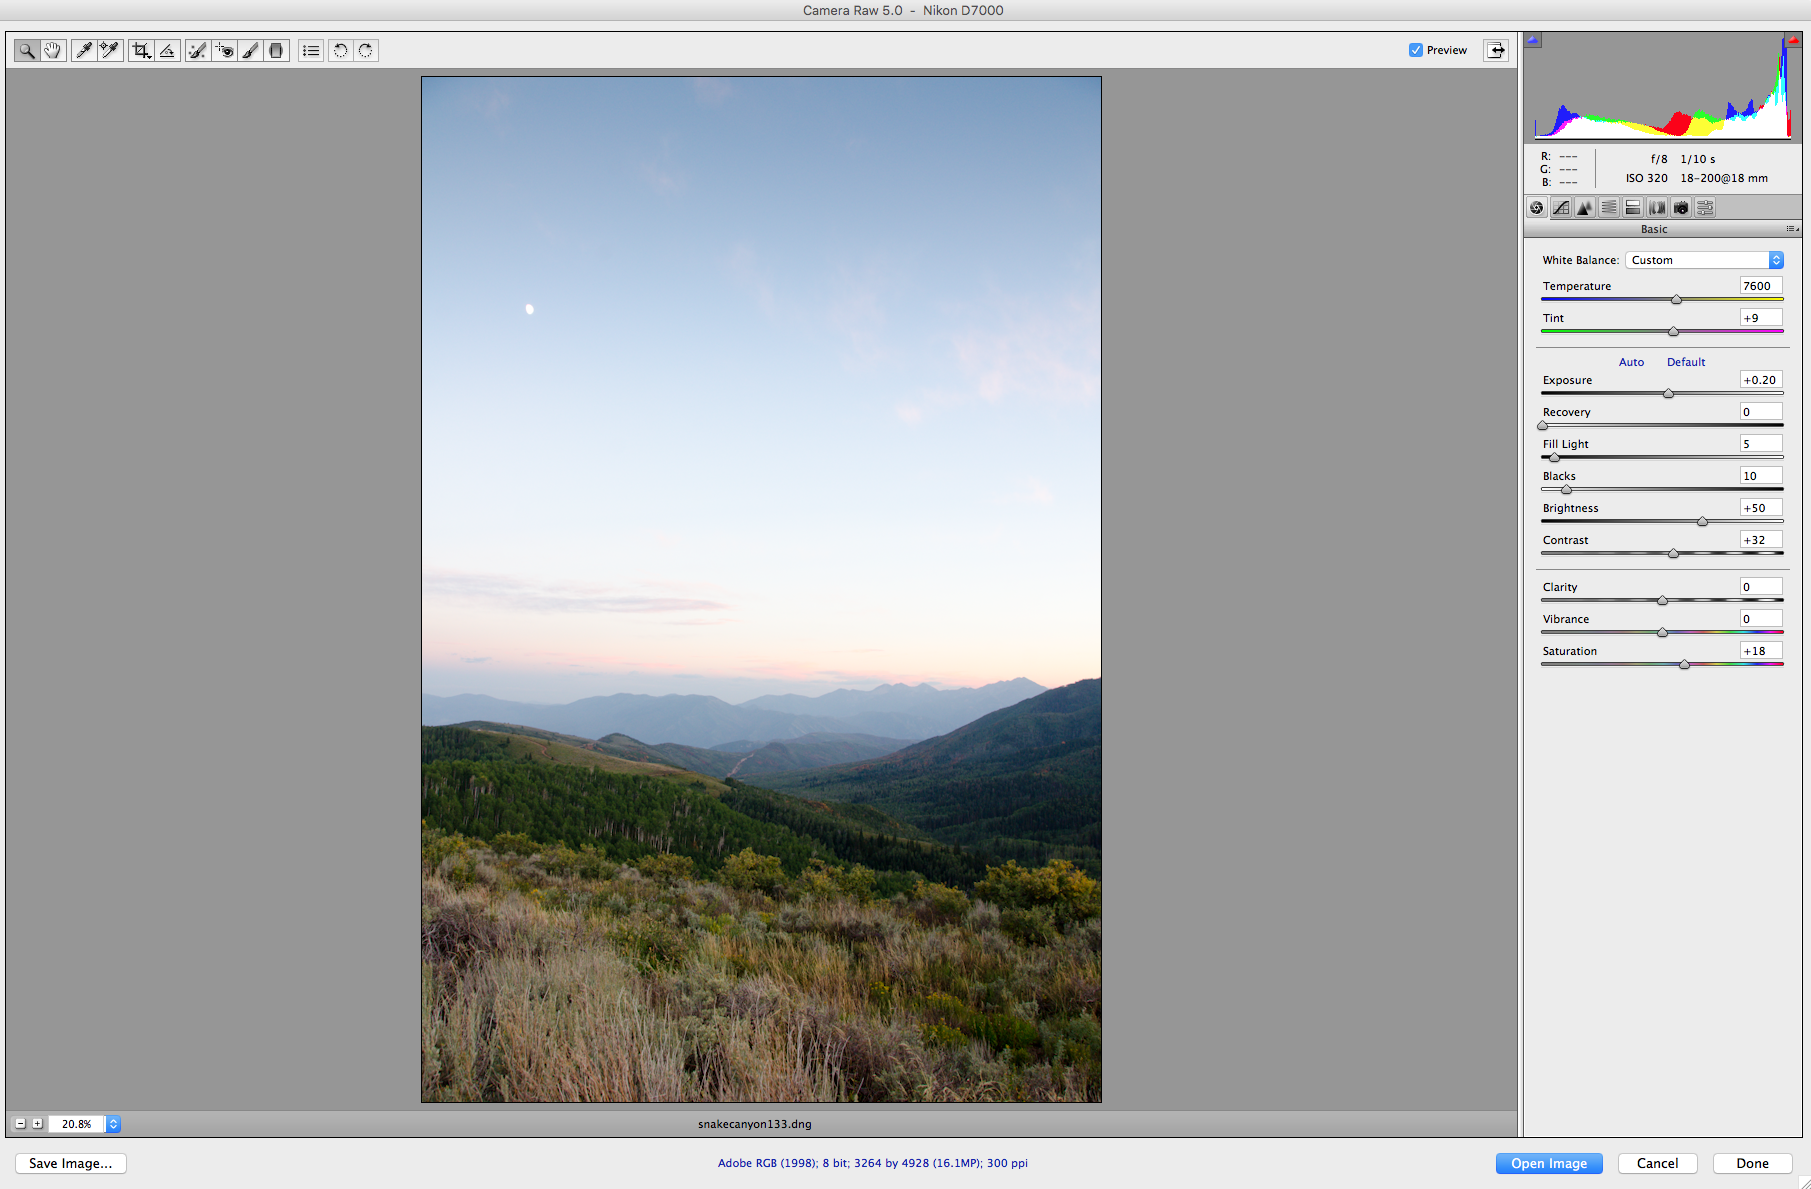
If you own Photoshop, you can process your Raw files with Camera Raw. This window will open up your Raw files, and here you can make your edits without losing any information with your file. Simply edit the photo how you want it, and click open image. Once it opens in photoshop, you can then save it in any other file format.
Lightroom is my favorite software for post-processing my images. Don't get me started on that though; we will talk about Lightroom soon! To convert Raw files in Lightroom, go to File - Import. Import the photos you want, and make your edits in the Develop window. Once you are done, click on your files and go to File - Export. Here you will choose the location, file name, etc. Make sure you choose JPEG if that's the format you want your new files to be.
I like to convert my Raw files to DNG files, using Adobe's Digital Negative Converter. DNG files are more universal, they are smaller than Raw files but are still lossless (contain the full image data and aren't compressed). You can select your folder of images, choose where to save them and what to rename the files. When ready, click convert and they will batch process! Here's what that window looks like:

Hopefully your Raw to JPEG process makes a little more sense now. Visit my contact page and shoot me an email if you have any further questions!!
Shooting in Raw vs. JPEG
Now that you have your DSLR and you've been learning different settings like aperture and shutter speed, it's time to think about files and formats! Have you ever heard of shooting in RAW and wondered what it really means? Are you crazy frustrated at how BIG these files are and that they take up so much room on your computer? Let's figure out what the heck RAW means, when to use this file size and how it's different from a regular good ol' JPEG file.
JPEG FILES
A JPEG file is a standard format that is processed right inside your camera. Every camera processes these files differently. In a nutshell, your camera automatically adds a few edits such as brightness, sharpening, blacks and contrast to a photo. It will then compress the information, making it a smaller file size. These compressed JPEG files can be viewed and printed right away by any photo program on the market. It's important to note that JPEG files discard some of the image information and detail, which cannot be brought back.
This leads us to a term called DYNAMIC RANGE. This term describes the range of the shadows and the highlights in an image, or the darkest and brightest areas. JPEG files don't have the full range of detail in those areas like RAW files do.
RAW FILES
A RAW file is is a file format that is complete or lossless, containing all of the data that comes from the camera's sensor. It is NOT processed, so the files usually look a little darker and flat. RAW files have to be processed and viewed using the software that came with your camera, or another popular program such as Adobe Photoshop, Lightroom, Aperture, etc. before having a photo ready to be displayed or printed. Raw files have a higher dynamic range (more detail in the highlights and shadows). A RAW file will save as .NEF on a Nikon camera and with a Canon camera, the file will be .CRW or .CR2.
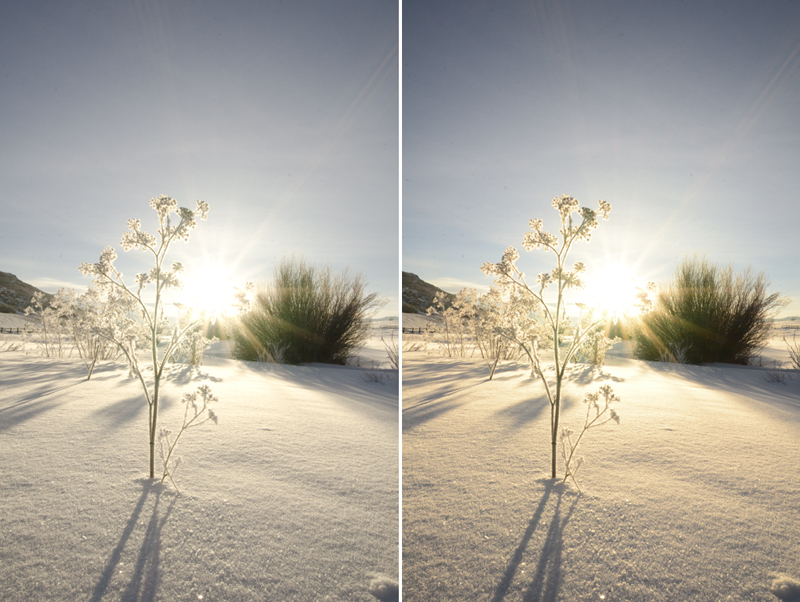
Here's a quick example of an image with a RAW file (left) and the JPEG file (right). You'll notice the JPEG photo on the right has more contrast, blacks and brightness added to it. These are untouched so you can see the difference between a RAW and a JPEG file, straight out of the camera.
When should we shoot in RAW and when should we shoot in JPEG?
Both file formats have their uses; I don't think it's smart to shoot either one ALL of the time. Oftentimes you will hear that it is better to shoot in RAW. That is true most of the time because a RAW file will always have more information, giving you more to work with in post-processing. Here are my suggestions about shooting in RAW vs. JPEG:
I would recommend shooting in RAW when you are in a situation where factors are constantly changing, requiring you to shoot quickly. For example, if you are taking photos outside and the sun is in and out of the clouds, constantly changing the lighting in your scene, it's easy to make a mistake with your settings and getting a poor exposure (a photo that is too bright or too dark). If you are shooting journalistic photos, weddings, or events, shooting in RAW will give room for error just incase your photo isn't the perfect exposure. This is very helpful for any event that might be significant (for instance, anything involving a BRIDE or your babies first cake smash; things you can't go back and redo). If you under pressure, trying to capture the perfect moment, shoot in RAW! If a JPEG photo is too bright, you can't darken those areas to see more detail. It will be BLOWN OUT and the information is gone.
I always shoot in RAW when I am shooting landscapes because an entire landscape scene has a high dynamic range of highlights and shadows. I might want to brighten up the shadowed areas or decrease the brightness of my highlights to get a great print.
If you need to view photos immediately after shooting, shoot in JPEG or RAW + JPEG. It's pretty obvious, but RAW + JPEG will give you both the RAW and the JPEG files; this way you have the RAW file for editing, and the JPEG for viewing right away.
It is important to remember that RAW files are MUCH larger in size than JPEGS. This means they will fill up space; so plan accordingly and be sure you have space on your hard drive or get an external one in order to store your files. If I am shooting a landscape to edit, print and frame at a large scale, RAW is a no-brainer for me. If I'm shooting a weekend BBQ with family and friends, I'll shoot JPEG.