Editing Tips

Free Lightroom Preset - The Perfect Black & White

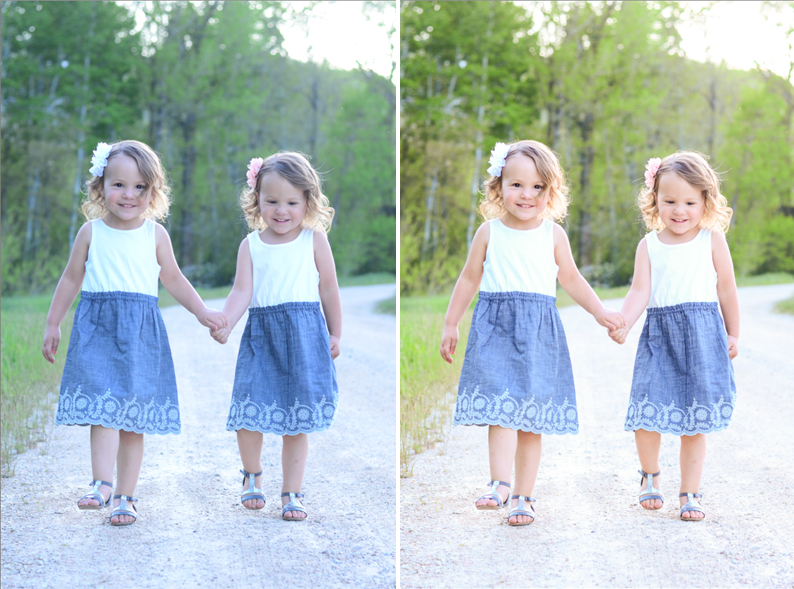
To all my Lightroom users out there, I've got a gift for you today. I'm sharing my favorite preset for converting photos to black and white! Black and white conversion can sometimes be more complicated than you hoped for. It seems simple enough, but it's easy to overdo it and you're left frustrated with an unsaturated photo that says.... BLAH.  

This preset will be your new best friend. I use this ALL the time, especially for portraiture. It is light and keeps things subtle and natural; it is definitely my go to for black and white conversion and I love it.

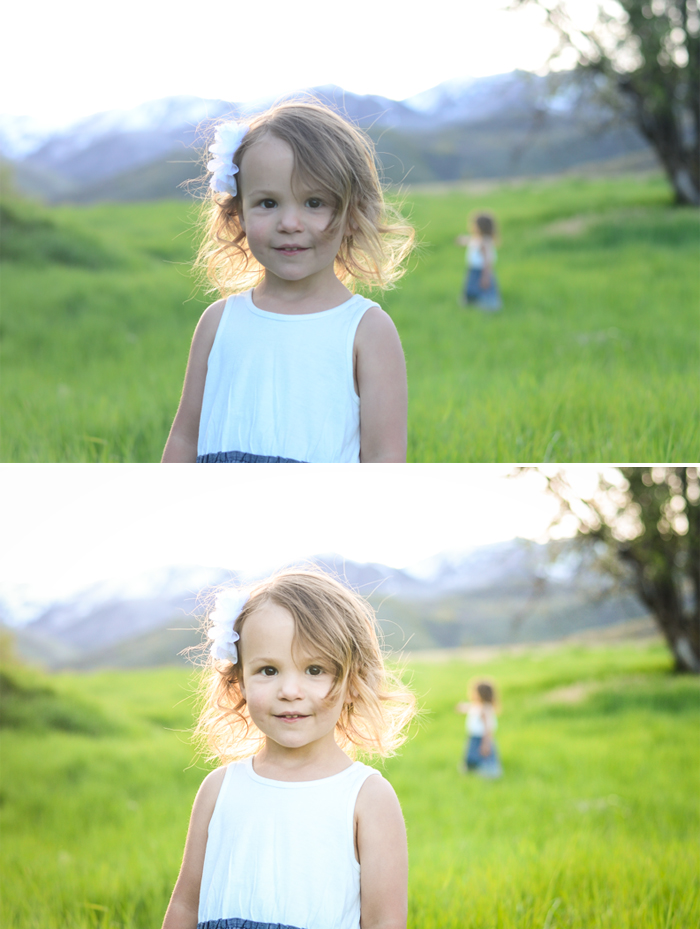
Every so often I will use this preset and add slightly more contrast. Try it out and see how you like it!

Click here for the free Lightroom Preset! 

Instructions:

  1. Click the link to automatically download the .lrtemplate file. 

  2. Find the file that was downloaded and save it to your desktop.

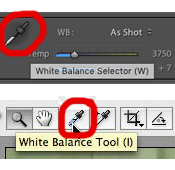
  3. Go to your Lightroom window and find your presets menu on the left. Ctrl+Click (right click) on the preset menu and click Import (see the image below).

  4. Locate your file and press Import to upload it into Lightroom. Lightroom will store it for you, so you can now delete the file or save it as a backup!

Here's another example of how lovely this black and white preset is!

Have a HAPPY MONDAY! 

PIN IT!


How to Correct Your White Balance in Post-Processing

White balance can make or break an image. It is really important to try and get your white balance right in camera, when you take your photo. I have covered the basics about setting your white balance in this article; if you haven't read it be sure to! It will help you understand what it is and why it is so important to getting a great image.  

Once in a while we're in a tough situation and we end up shooting without selecting the best white balance option, leaving us with a very BLUE image or an image that is so ORANGE, it's scary! The good news is that it is easy to fix your white balance in post-processing. I'm going to walk you through how to do this in both Lightroom and Photoshop.

Here's an example of a photo I took and didn't like the White Balance. Not even a little bit.

If you compare it to the shot below where I used a custom white balance setting, you'll notice it looks much more inviting and not yucky orange. Luckily, I made the correction IN CAMERA, which is always best... BUT I'll teach you how to fix a photo if you're stuck with a color cast you don't like! 

Step One

Find your white balance dropper tool. It looks like this below, on the top is Lightroom and the bottom is the top toolbar in camera RAW in Photoshop. 

Use this tool to find and click on a neutral area in your image (any area that is white, black or gray). This will automatically adjust your white balance settings; try a few different neutral areas and see which one is the closest to the light & setting you took the photo in. 

Another trick to picking a good neutral for your dropper tool is to watch the numbers in the box below (RGB) and try to get these three values to be as close as possible for the best results. 

This is the result below from picking a neutral in my image above. It's still a little green and a little yellow, so check the next step below to get it just right!

Step Two

In most cases, you'll want to make smaller adjustments by using your white balance sliders to fine-tune the image. Check the toolbars below:

Play around with the temperature sliders to get your white balance exactly where you want it. Here's a finished image after using my temperature and tint sliders to get it where I wanted it. This is where I got my first YUCKY orange image! Doesn't it look a whole lot better?

Step Three

If you're not getting the results you want, you can try to choose a pre-selected white balance setting that fits your image. For example, select from the drop-down menu below to choose 'shade' if you shot in the shade, and see what it does for you. You'll only have these options if you shot in RAW. If you didn't, you'll have an Auto setting. 

The Auto setting did a pretty good job for the image below! It was too cool for me, and just selecting the Auto option warmed it up great. That's the only thing I clicked to get it from the image on the left to the image on the right. Try it out and see if it gets you closer to where you want to be.

I hope these White Balance tools can help you get your images where you want them to be, even if you rush and choose the incorrect settings in camera! The more you practice and play around with it, the easier it gets to fine-tune your White Balance and get the most natural looking photos. 

GOOD LUCK!


Simple Editing in Lightroom - Video Tutorial

Check out my quick video walk-through of how I edited this portrait! It doesn't take much to make your photos pop. Learn how to get this look in Lightroom by following my easy tutorial! 

Here's the Video Tutorial:


How to Import Photos Into Lightroom - Staying Organized

I can't believe it's June 1st! I love the month of June; it means summer is here, my birthday is coming up and it's time for a lot of baseball and barbecues. This also means MORE photos of everyday life. How can we keep track of and organize thousands of photos? Lightroom!

I've realized that by teaching about Lightroom, I myself need to get even more organized with my photo library! If you haven't read my first post about a quick intro to Lightroom, read it first. In Lightroom, it is important to get a good system going right from the import. I made a quick video walk through for you to understand your options when importing photos in Lightroom. This tutorial will help you to add keywords to find photos easily in the future. It will also help you name your files and establish a good system to make your life easier when it comes to organizing your photos!

Check it out!

For some reason part of my window got trimmed, so I hope you can follow along okay! The most important things to remember when importing are:

  • Rename your files so they are easy to understand and find.

  • Select the destination folder on your hard drive where you want to store your photos (I don't do it by date. Trying to remember what I shot in April of 2015 isn't convenient for me. I like to name my folders by event). Under organize, I choose 'into one folder' as you can see below. If you prefer to have your folders labeled by date, you can choose 'by date' instead. 

  • Add keywords to your images to help you find them in the future. 

I hope you find Lightroom's system of organizing photos easy and helpful like I do! It is almost impossible to not get overwhelmed by the amount of photos we take these days. Don't add extra stress in your life by throwing your photos on your computer without a good system to stay organized! 


Introduction to Lightroom - Learn Lightroom the Easy Way!

If you have recently purchased Adobe Lightroom, congratulations! I promise you will absolutely LOVE this editing program. I seriously do and I use it almost every day. Lightroom simplifies editing. It's so easy and actually enjoyable. PLUS it is a great way to stay organized so you don't make a mess of your hard drive with hundreds or thousands of photos. Let's jump in and get familiar with the basics today!

To start it off, Lightroom works in different 'modules'. These are different screens designed for different tasks; luckily, you really only need to know two of them. These are your Library and Develop modules. In the Library module you can import and organize your photos. Simply choose the location of the images you'd like to find, and click import. Here's a peek at this window:

The awesome thing about Lightroom is that it actually saves all of your edits in different catalogues on your hard drive. This doesn't take up nearly as much room as for example, psd (photoshop) files. You can also revert to the original image at ANY time; you'll never lose your original file! I love this feature. 

In your Library you can set up collections, folders and use keywords to help you sort and rearrange your photos. This might seem a little dull but this module will save you when you want to find photos down the road, and have a system set up to easily find what you're looking for! 

Once you have your photos imported, you can select one and click on the Develop module, right next to the Library tab at the top. This is the fun part! The Develop module is your darkroom, where you can make all the edits and be creative with your photos. You can also label your photos, making it easy to sort and edit only the best photos from any shoot. 

Here's a quick breakdown of the tools you have on your right-hand toolbar. You'll see the histogram for your image, which will show you your light and dark values. Mine are mostly to the right, because my subject is pretty bright and I let the background be over-exposed. I like this look for back-lit subjects. 

Below the histogram you'll see your crop tool, a spot removal tool (to fix blemishes or remove things from your photo), a red eye tool, your graduated filter tool, and your local adjustment brush. This brush is useful to brighten/darken certain areas of your image, among other adjustments to specific areas! I use this often to brighten up faces. 

Here's a quick breakdown of your basic toolbar. You can change your image to black and white, adjust your white balance, exposure, contrast, saturation, etc. 

Here is a quick example of some edits I did for the photo example below. I began by increasing my exposure to make it brighter (sliding the slider to the right), adding contrast to make it pop, changed the white balance by increasing the temperature to warm it up and added a little clarity and vibrance. I always start by getting the exposure where I want it, add contrast, fine tune the highlights and shadow areas, then adjust the white balance to get the light the right temperature. I shot this in the evening, which is a colder, bluer light if shot on an auto-white balance setting. I usually shoot on my kelvin white balance setting, so I can get the photo warmer in camera. I definitely wanted to warm it up and Lightroom makes it so easy to change little by little until you get it just right. 

Here's the before and after:

I hope this quick walk through helps you on your road to understanding how Lightroom works. This is just a quick intro; there's a lot more to come, such as my favorite feature of syncing edits to multiple photos all at once, along with organizing tips to keep your photo storage under control!

I will also do a video walk throughs on how I edit specific photos so you can see exactly how I adjust my images to get them to look great! Play around with your tools and you'll find that Lightroom allows you to make simple edits that can drastically improve your photos!