Recipes

Fourth of July Layered Drinks!

For the Holiday weekend I thought I'd do a fun patriotic recipe post! I came across these fun red, white and blue layered drinks that are so easy to make and perfect for the 4th of July. 

All you have to do is get three drinks that are red, white and blue and that have different sugar contents. I chose Sobe Pina Colada, Gatorade Blue Cherry and G2 Fruit Punch. 

Steps: 

  • Pour the drink that has the highest amount of sugar into the glass of ice first, 1/3 of the way full. For mine it was the Sobe. 

  • Pour the drink with the next highest sugar content into the glass REALLY slowly, trying to have it hit an ice cube instead of letting it hit the Pina Colada layer to avoid mixing (blue gatorade).

  • Follow with the red layer (or the drink with the least amount of sugar, G2) and pour to the top. Once again, go SLOW. 

Viola! There you have it. I moved my straw after pouring the drink so my white layer shrunk a little, but it's still pretty sweet right? I also wondered if this kind of drink would even taste good; it might have been the hot summer day that helped but I honestly really liked it! It was delicious!

Behind the scenes: I would have preferred one of those white and blue or white and red paper striped straws, but sometimes you have to make due with what you have! We're hosting a pretty big party tonight so I didn't have the time to run around. I love photographing food & drinks can be simple - one patriotic napkin, a straw, a mason jar and a tablecloth in the background. I love my wood table top too. Play around with different angles and materials to find the shot you like best! I didn't like any of the first 10-15 shots I took. The more you shoot, the better your results will be.

My settings: 50mm lens, ISO 250, f/3.2 and 1/250 with a custom white balance setting (K5260) and window light. 

Have a great weekend!!


Celebrate St. Patrick's Day with a Green Smoothie!

This is how I do St. Patrick's Day. Simple, healthy and the kids love it! I love that you can pack in a ton of greens into a smoothie and kids don't even know they are in there. Well, my kids do, but they are a little strange and sometimes eat spinach plain while we pile it on our turkey sandwiches! If your kid hates green veggies, this is an easy way to still get them the great nutrients. 

Green Smoothie Recipe - St. Patrick's Day Smoothie - www.mommatography.com

Green Smoothie Recipe

  • 1/2 an orange

  • 1/4 c. orange juice

  • 3/4 c. fresh spinach

  • 1/4 c. greek yogurt

  • 1/2 a banana

  • 1/4 c. frozen peaches

  • 4-5 ice cubes

Put all ingredients in blender and blend until smooth! By the way, I never measure anything. I just throw it in there, so this is a guess on amounts. HA! I do so many variations of this smoothie every week. I'll alternate adding frozen berries, fresh strawberries, kale, lime juice, and even substitute the orange juice for coconut water. Who doesn't love having a smoothie for breakfast?

And who am I kidding about my kids only having a green smoothie today? They are having a green shamrock pancake party with friends for lunch! :) I did the green eggs and ham thing once or twice but eating green eggs kind of grosses me out. So we stick with the green smoothie and pancake plan. 

Green Smoothie Recipe - St. Patrick's Day Smoothie - www.mommatography.com

Hope you have a fun holiday!

Pin it:

Green Smoothie Recipe that Kids Love! - www.mommatography.com
 

Avocado, Tomato & Cayenne Melt

It's time to lighten things up with a good recipe. I hope the last few posts weren't information overload for you learning how to take sharper photos! So this week we're just going to have fun. I also have an awesome feature coming up on Friday so stay tuned!

This incredibly simple yet delicious open-faced sandwich came from my sweet Grandma, Nola Rae. My Grandma doesn't cook. Not even a little. She was known for always having gum balls, fireballs and candy bars in her purse. At night we'd snack on ice cream bars or frosted root beer floats in her den while watching an old classic movie or playing cards for hours. She tells everyone she never has to cook a day in her life; she's always been cooked for or stopped in at the family-owned restaurant in Mesa called Tia Rosa's. It is so good, I could eat there every day. Let's get back to the sandwich.

One summer while visiting, Grandma made us lunch in her little kitchen. I honestly have no idea where she came up with this idea, but my sisters and my mom and I were blown away by how much we loved it! It is SO easy to make, I almost always have these ingredients on hand and it's pretty healthy. I eat this multiple times a week for lunch. Thanks to my fun-loving Grandma even for just one recipe that I have already shared with many friends and family members. 

Avocado, Tomato and Cayenne Melts - Avocado, Tomato Sandwiches - www.mommatography.com

Avocado Tomato & Cayenne Melt

  • Slices of Bread (I LOVE using the thin-sliced Dave's Killer Bread from Costco)

  • A little mayo 

  • Cayenne pepper

  • Sliced tomatoes

  • Avocado slices

  • Sliced Cheese (I prefer extra-sharp cheddar, you can use any kind)

  • Salt & Pepper

Spread a thin layer of mayo on your bread. Sprinkle some cayenne pepper, depending on how much of a kick you like. If you're not a fan of things spicy, just do a pinch for flavor.  Layer avocado slices and top with 3-4 tomato slices. Sprinkle with salt and pepper and place slices of cheese over the top. Broil on high until the cheese is melted and bubbly, and the edges of the bread are slightly toasted. 

Avocado, Tomato and Cayenne Melts - Avocado, Tomato Sandwiches - www.mommatography.com

Try this using fresh garden tomatoes. It will knock your socks off!! These are just Roma tomatoes; I get so depressed when my tomato plants die and we have to buy them from the store again! 

Avocado, Tomato and Cayenne Melts - Avocado, Tomato Sandwiches - www.mommatography.com

Give them a try and I bet you'll be hooked like I am! 

Avocado, Tomato and Cayenne Melts - Avocado, Tomato Sandwiches - www.mommatography.com
 

The Perfect Healthy Lunch - Quinoa Salad

It's still January and I got myself thinking that I need to find some really great recipes I can use for a quick but healthy lunch. I want to make a big batch of something that I can easily grab that will last me a few days through the week (not giving in and eating the leftover quesadilla from the lunch I made for little ones). Once lunchtime hits and my kids are fed, down for naps, and the house is quiet, the last thing I want to do is spend another thirty minutes in the kitchen making myself a healthy lunch. I want to relax! 

I found this recipe and thought it was the perfect place to start. It is such a great base to make my own variations depending on what I have in my fridge. I didn't have red peppers, so I roasted some red onions with my cauliflower instead and added some avocado slices on the side. I bet it was twice as good with the roasted peppers. I also cheated and used a pre-packaged garlic Quinoa and cooked it according to the stovetop instructions, since I didn't have any on hand. I also used a little less oil in the dressing. There are so many variations you could create with this salad! That's why I love it so much. It was delicious. 

Roasted Quinoa Salad Recipe - www.mommatography.com

Roasted Cauliflower Quinoa Salad:

Serves: 3 to 4 servings

1 medium head cauliflower
1 tablespoon olive oil
¼ teaspoon salt
2 red peppers (see note)
½ cup uncooked quinoa
¼ cup minced cilantro
¼ cup minced fresh parsley
2 tablespoons olive oil
3 tablespoons lime juice
2 tablespoons honey

Directions:
 

  • Preheat the oven to 425˚ F. Cut cauliflower into bite-size pieces and toss with 1 tablespoon olive oil and salt. Place on a baking tray along with whole red peppers (or any other vegetable you'd like to add). Roast and stir occasionally, until the cauliflower is caramelized and peppers charred (about 25-35 mins). Remove from oven and cool slightly. Remove the skin from the pepper and chop.

  • Rinse quinoa and combine with 1 cup water in a medium pot. Bring to a boil, reduce to a simmer, and cook for until water is almost fully absorbed, about 12-15 minutes. Remove from heat, cover and let sit until remaining water is absorbed, about 5 minutes.

  • Combine quinoa, cauliflower, and roasted red pepper in a bowl. Add cilantro and parsley to quinoa mixture.

  • To make dressing, combine olive oil, lime juice, and honey in a jar with liquid. Shake until combined. Pour on salad and toss until combined. Taste and add more salt as desired.

Recipe adapted from Naturally Ella. 

Roasted Quinoa Salad Recipe - Food Photography - www.mommatography.com

All I used photograph this dish was a small white plate, a fork, and an old white shelf I painted white! I used my 50mm lens and shot on f/2.8, 1/350 second, ISO 400 and a custom white balance. I stood on a tall stool to get the the composition for the first photo! 

Photographing food can be pretty simple. I love it. 

Pin the recipe for later!

Roasted Quinoa Salad & Food Photography Tips - www.mommatography.com

Feature Friday - Food Photography & Styling Tips from The Gathering Table

The first Friday of every month will be Feature Friday. Mommatography will showcase photographers, artists, and fellow bloggers to share their unique talents and skills. This week's post comes from a friend and food photographer Sheena Bates. Check out her blog and follow The Gathering Table. If you are a food blogger, or want to improve your food photography, today's post is full of great styling and composition tips. 


Hi! I’m Sheena Bates from The Gathering Table. I’m super excited to be here and share some tips on food photography. Just to give you a little background on myself, I’m originally from Utah and attended Utah Valley University  where I got my BFA in photography. That is where I discovered food photography and how much I love it. I now live in London with my husband and two year old son. My husband is a photographer as well. I’ve done a few commercial shoots for various restaurants and catering companies both in Utah and in London. I started the Gathering Table when I was in school and have been on and off with blogging till now, when I’ve decided to really get into it. I love that it allows me to follow my passion, while still being at home with my son.

Food photography is awesome! In my humble opinion, it is truly the best genre of photography, because it’s something that we can all relate to. After all, we all eat, right? And who doesn’t have a memory that is tied so closely with food, that seeing a lovely, composed shot of something delicious will take you right back? That is why I love shooting food. That and you don’t have to try to coax little ones to smile naturally. 

Food Photography Styling Tips - Sheena Bates - The Gathering Table

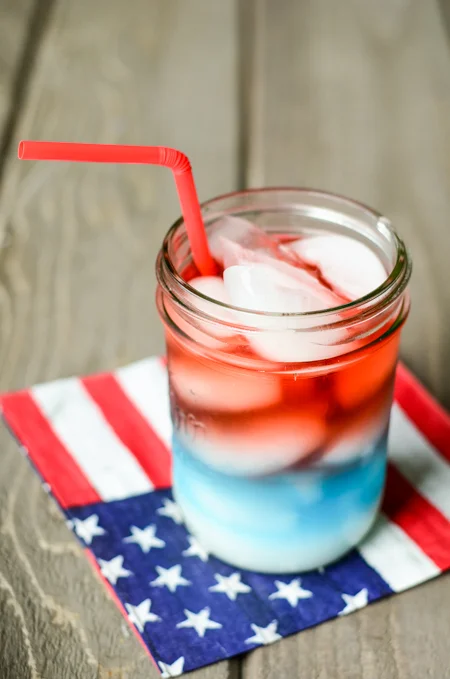
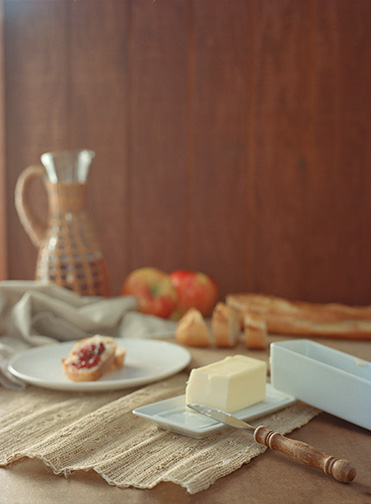
On to the good stuff! Let’s talk styling. There is no one way to style a dish. I typically like to think about what it is that I’m styling. What images come to mind when I think of that food. Let’s take soup for example: soup is (usually) warm; something you have at home, a comfort food. So I may go more rustic with my styling, playing with warm tones, worn or as I like to think of it, loved props. Fish, on the other hand, has to be fresh, can be warm or cold, and typically has a lighter, lower calorie connotation. So I would use lots of greens in my styling, fresh herbs and go for a lighter, airier look. The styling and the lighting of your image is really what will create the mood for your food photos. 

After deciding upon my mood, I gather props. Here you can go very busy, or simple. Like Alise mentioned in the intro post to food photography, charity shops (thrift stores) are a great place to look for props. Scraps of fabric, napkins, ingredients that are in the dish, and other dishes such as glasses, utensils all make great props to style your photo.

Food Photography Styling Tips - Sheena Bates - The Gathering Table

 [rice and beans: iso 800 f/3.5 1/100 sec] [couscous with lamb and peas: iso 800 f/2.8  1/500 sec]

For the rice and beans photo I included a lot of props (there were more on the other side of the dish). To tell more of a story, you can use the ingredients that are in the dish to help style your photo. It is also helpful to use a pan or pot that the dish may have been cooked in (I usually don’t use the actually pot or pan that it was cooked in, but will transfer it to a clean one, so there aren’t any spills—unless that looks add to the look and story I’m going for—see what I mean about no one way to style?). The image on the right, the couscous, lamb and peas, has a much more simple approach. There are really only three things in the photo: the napkin, the dish and the water. It still works though because of the garnishes: the yoghurt and the herbs. Can you imagine if it was just couscous and lamb? Wouldn’t look very appetizing! 

I love to try to tell a story when I style. I think about what would really be on the table or counter if someone were making the dish. Another way to do this would be shooting the different steps in recipe, but in an artful way.  

Food Photography Styling Tips - Sheena Bates - The Gathering Table

[thumbprint cookies: iso 800 35 mm f 4.5 1/640 sec] [chocolate cookies: iso 1600 50 mm f/3.5 1/125 sec]

The image on the left, the thumbprint cookies, tells a story about packaging food gifts for neighbors at Christmas time. Of course, no one would have a scene exactly like this, but it tells the story. The chocolate cookies, on right, tells about the baking process, while showing the final result. 

Food Photography Styling Tips - Sheena Bates - The Gathering Table

[rolling dough: iso 400 50 mm f/2.2 1/500] [cutting dough, left: iso 400 50 mm f/2.2 1/250] [cutting dough, right: iso 400 50 mm f/2.2 1/250]

These set of images show the process of rolling out the cookie dough and cutting it out, but it’s not your typical step by step photo. Think outside the box a little. 

Let’s talk composition. Don’t be afraid to cut off part of the dish. There is no rule that you have to include the whole thing. Think about the rule of thirds, but don’t feel married to it. It’s helpful when shooting to try many different angles. Get overhead, get it at 45º, and everything in between. 

Food Photography Styling Tips - Sheena Bates - The Gathering Table

This diptych is the exact same setting. Nothing has moved but the camera (the lens changed too). But they’re very different! And you can see, the one on the right I cut part of the bowl of soup off, while the left has most of the scene. 

Food Photography Styling Tips - Sheena Bates - The Gathering Table

[veg soup left: iso 800 50 mm f/2.8 1/100 sec] [veg soup right: iso 800 50 mm f/2.8 1/100 sec]

These images of the vegetable soup show just how different an image can look because of your angle. The one on the left, you catch the reflection at the lower angle, while the one on the right you catch the beautiful colours of the soup. That reflection can give your image a completely different feel. 

Another fun way to compose your images is to play with line. This can make for incredibly simple styled images, but that are still very interesting and catching. 

Food Photography Styling Tips - Sheena Bates - The Gathering Table

[clementines: iso 200 50 mm f/2.8 1/125 sec]

This shot of the clementines plays with diagonal line. There is actually very little going on in the photo. Because of the dynamic diagonal line created by the placement of the fruit, it works and it interesting.

using line 2.jpg

[muffin ingredients: iso 1600 24mm f/4.0 1/100 sec]

This shot of the muffin ingredients uses line, or a grid format to add interest to what would be a boring photo of ingredients. 

I hope this was helpful with your food photography. I’d love to hear from you and see your progress. Feel free to drop me a line sheena@sheenabates.com and be sure to head over to The Gathering Table and follow my posts. You can also find me on instagram: @gatheringtable. Hope to see you there.