editing tips

Introduction to Lightroom - Learn Lightroom the Easy Way!

If you have recently purchased Adobe Lightroom, congratulations! I promise you will absolutely LOVE this editing program. I seriously do and I use it almost every day. Lightroom simplifies editing. It's so easy and actually enjoyable. PLUS it is a great way to stay organized so you don't make a mess of your hard drive with hundreds or thousands of photos. Let's jump in and get familiar with the basics today!

To start it off, Lightroom works in different 'modules'. These are different screens designed for different tasks; luckily, you really only need to know two of them. These are your Library and Develop modules. In the Library module you can import and organize your photos. Simply choose the location of the images you'd like to find, and click import. Here's a peek at this window:

The awesome thing about Lightroom is that it actually saves all of your edits in different catalogues on your hard drive. This doesn't take up nearly as much room as for example, psd (photoshop) files. You can also revert to the original image at ANY time; you'll never lose your original file! I love this feature. 

In your Library you can set up collections, folders and use keywords to help you sort and rearrange your photos. This might seem a little dull but this module will save you when you want to find photos down the road, and have a system set up to easily find what you're looking for! 

Once you have your photos imported, you can select one and click on the Develop module, right next to the Library tab at the top. This is the fun part! The Develop module is your darkroom, where you can make all the edits and be creative with your photos. You can also label your photos, making it easy to sort and edit only the best photos from any shoot. 

Here's a quick breakdown of the tools you have on your right-hand toolbar. You'll see the histogram for your image, which will show you your light and dark values. Mine are mostly to the right, because my subject is pretty bright and I let the background be over-exposed. I like this look for back-lit subjects. 

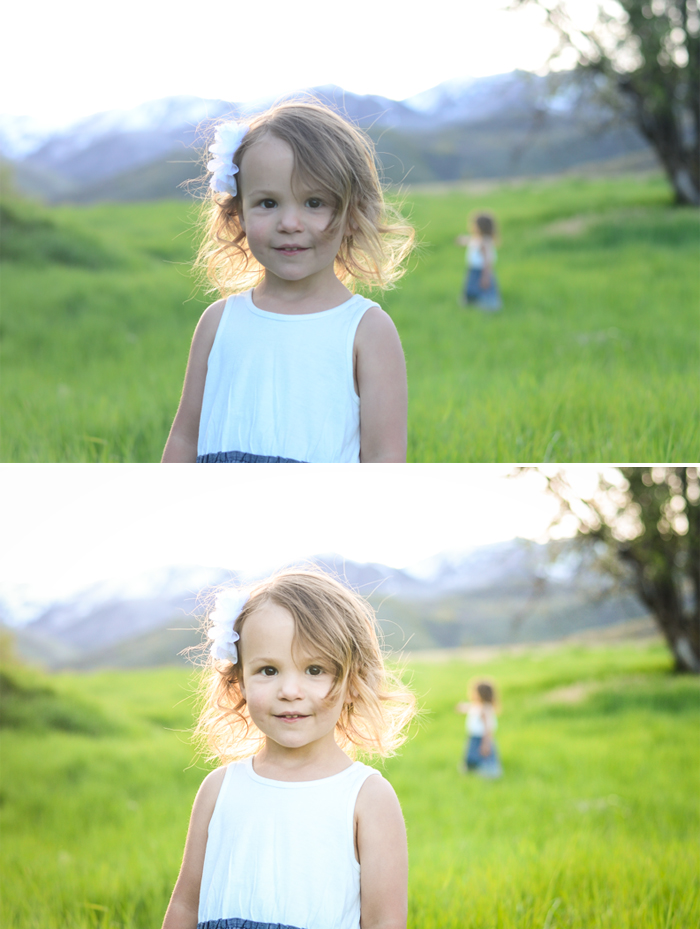
Below the histogram you'll see your crop tool, a spot removal tool (to fix blemishes or remove things from your photo), a red eye tool, your graduated filter tool, and your local adjustment brush. This brush is useful to brighten/darken certain areas of your image, among other adjustments to specific areas! I use this often to brighten up faces. 

Here's a quick breakdown of your basic toolbar. You can change your image to black and white, adjust your white balance, exposure, contrast, saturation, etc. 

Here is a quick example of some edits I did for the photo example below. I began by increasing my exposure to make it brighter (sliding the slider to the right), adding contrast to make it pop, changed the white balance by increasing the temperature to warm it up and added a little clarity and vibrance. I always start by getting the exposure where I want it, add contrast, fine tune the highlights and shadow areas, then adjust the white balance to get the light the right temperature. I shot this in the evening, which is a colder, bluer light if shot on an auto-white balance setting. I usually shoot on my kelvin white balance setting, so I can get the photo warmer in camera. I definitely wanted to warm it up and Lightroom makes it so easy to change little by little until you get it just right. 

Here's the before and after:

I hope this quick walk through helps you on your road to understanding how Lightroom works. This is just a quick intro; there's a lot more to come, such as my favorite feature of syncing edits to multiple photos all at once, along with organizing tips to keep your photo storage under control!

I will also do a video walk throughs on how I edit specific photos so you can see exactly how I adjust my images to get them to look great! Play around with your tools and you'll find that Lightroom allows you to make simple edits that can drastically improve your photos! 


The Best Free Photo Editing Software

Now that we have a few months' worth of tips and tricks to take better photos, I figured it was time to start diving into editing your photos! Before you get all worried or bummed out that you don't own Adobe Photoshop or Lightroom, take a deep breath and hear me out. There are a handful of pretty great FREE photo editing programs that you can use to make your pictures look fantastic. Whether you are a fellow blogger aiming for beautiful photos to draw viewers in, or a mom making a photo book of your kids, these editing programs will help you get closer to your end goal; photos that stand out and look great. 

Here are my top three free photo editing programs:

1. PIXLR (Works on Windows, Mac, Mobile & Web) 

Pixlr is a fun program that has many tools to edit with, a huge library of filters to change the look of your image and similar layering options like photoshop has (grouping your edits by steps in layers). The sidebar has a lot of the same tools that photoshop has to offer as well! You can either download it free for your desktop, get the app for your phone or quickly access it right inside your internet browser (the only negative about that is you have ads that take up space in your editing window). All you have to do is open your image and get started!

Best Free Photo Editing Software Programs - www.mommatography.com

Go to PIXLR.com!

2. GIMP

GIMP is often referred to as one of the closest free editing programs to Photoshop. It is pretty powerful and offers many tools to edit. The tools on the left hand side (shown by icons) have descriptions that come up to help familiarize you with what each tool does. GIMP's website also offers a page of tutorials to help you understand some of the tools and get you started with editing. 

Best Free Photo Editing Software Programs - www.mommatography.com

Go to GIMP!

3. Adobe Photoshop

You thought you read that wrong, right? It's true! Adobe has recently released a free download for Adobe Photoshop CS2. Yes this is outdated, and old, and sometimes unsupported... BUT you can still have access to a version of Photoshop for free. All you have to do is go to adobe.com, create a login, sign in and accept the terms and conditions (they say that adobe doesn't recommend that you download older versions of the software..) and pick your preferred language. You can also download the other Adobe CS2 suite for free, including Illustrator, InDesign and more.