DIY Lego Gummies

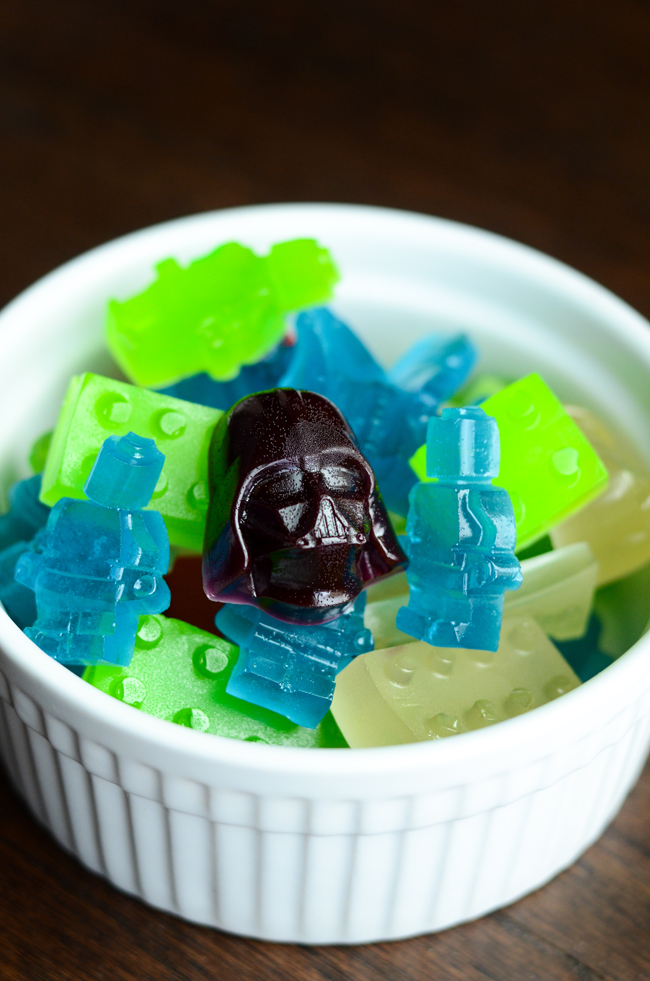
This weekend we threw a Star Wars themed birthday party for my little guy; I cannot believe I have a five year old! The party was a huge success and we had a lot of fun with it. I thought it would be a perfect time to post a recipe for a really fun project for kids (or adults, let's be honest, these are pretty sweet)! I will also combine everything we've learned about aperture, shutter speed and ISO and give you some examples of how I shot some photos of these awesome edible legos. Legos always seem to find their way into kids mouths and these ones you can actually eat while you stack them and play! They turned out awesome.

DIY Lego Gummies - www.mommatography.com

All you need for this recipe is three key ingredients, and your lego molds.

Lego & Star Wars Gummy Molds

We bought ours here on amazon. We also got a star wars pack, which were seriously the coolest. It was also convenient to have squeezable condiment bottles like these, to help pour the hot liquid into the molds. Here are the ingredients you need: 

  • Jell-0

  • Karo corn syrup

  • Unflavored gelatine (The small Knox box comes with 4 packets)

  • Water

  • Silicone lego mold

In a measuring cup, combine 1/2 cup cold water with 1/4 cup corn syrup. Stir to dissolve and pour into a pot on the stove. Don't turn on heat yet. Add 2 packets of unflavored gelatin and mix in your packet of Jell-O. Stir it slowly with a whisk to let it all set in. Set your stove to medium heat and stir every minute or two for 5-10 minutes. When the gelatin is completely liquified, the syrup is ready to pour into the molds. It will be very hot, so be careful not to spill. If you have bubbles or gelatin lumps, you may pour the liquid into a heat-resistance container and scrape the bubbles/lumps off the top, and then pour into your molds. If you have bubbles that rise to the top of the molds, you can scrape off the bubbles there as well to make your gummies turn out more smooth. Allow at least five hours to set.

I didn't get to photograph the process because we made these at 1:30 AM (crazy I know, the life of a parent). For the lego molds above and this image below I shot with my 50mm f/1.8 lens and these were my settings: aperture: f/3.2, shutter speed: 1/200, ISO: 800. I always try to shoot close to natural window light, and use a shallow depth of field to get the background to blur and bring the focus in on the details of the food or product I am shooting. I shot on my hardwood floor, and in Lightroom (my editing software) added some contrast and darkened the edges of the photo a little bit to make the subject pop. 

DIY Lego Gummy Molds - www.mommatography.com

If you want to see more about the gummy legos, like how to make them interlocking, check out the instructions here. We made five different batches to get a variety of colors for the kids to play with. 

The gummies come out of the molds really easily, and the details are perfect! For these images I shot right in front of my sliding glass door. My settings were aperture: f/3.2, shutter speed: 1/125, ISO: 1250. 

DIY Star Wars Candy - www.mommatography.com
DIY Star Wars Gummy Candy - www.mommatography.com

Keep practicing changing your aperture and shutter speed, either on Aperture Priority, Shutter Priority, or be really brave and give Manual Mode a try! On Manual you will select all of your settings, Aperture, Shutter Speed and ISO. It takes a little time to catch on to switching all three settings for one shot, but I promise you will love it once you get it!