popular post

Rome & Paris - Tips for Shooting Photos at Night

Buongiorno and bonjour! I am back! I took a small leave of absence for my very first trip to EUROPE (yay!), followed by making up time with the three little ones we left behind for almost two weeks. Needless to say, it has been quite an amazing month. I have always dreamed about walking along the streets in Europe. We spent five days in Rome and five days in Paris. It really was a dream come true, and I had the best time photographing while there. Talk about eye candy! Leaving both countries was hard to do, but October in Utah has been full of beautiful weather, fall leaves everywhere and fun activities with the kids. I needed some catch up time with them and it has been time well spent.

I hauled around my old film camera on our trip, my Hasselblad 500 C/M, which completely has my heart. Nothing can beat film in my mind and it made me pretty happy to shoot rolls of film again. In my next post I'll share with you more highlights from our trip and some of my favorites from my film camera! 

Today I am going to give you a handful of tips for getting great photographs at night time. Whether you are traveling, shooting something close to home or just want to experiment, long exposures at nighttime can be SO fun. With a few helpful tips you can get great photos. Some things just come to life when the bright mid-day sun has gone to bed.  

Tips for Shooting Photos at Night

  • Tip #1 - USE A TRIPOD! 

When you want to take a photo in dim lighting, at night or any dark setting, you'll most likely have to do a long exposure. This means you need a sllloowww shutter speed to let more light record on your camera's sensor to actually have a photograph show up. If it's dark and you try shooting at 1/60th of a second, you don't have a lot of light coming through your lens. What happens when you start shooting at slower shutter speeds? CAMERA SHAKE! MOTION BLUR! Any movement to the camera will cause your image to be blurry. You MUST have some kind of tripod or still, flat surface to place your camera.

This photo of the Trevi Fountain in Rome is a good example of showing motion blur (the water is blurred from the long exposure) but the building is completely sharp and in focus! I simply placed my tripod on a post to get this shot.

When traveling, I always want to make sure I have a tripod to rely on. I bought this fun little Pedco UltraPod II Lightweight Travel Tripod on Amazon for only $18.95, and it's been so worth it! The head swivels so I can easily change my composition and it even comes with a strap you can wrap around poles or trees, etc. It folds down really small and is worth every penny. I love not having to pack a huge bulky, heavy tripod on a trip. Check it out. 

  • Tip #2 - Use your timer!

I have found that if I'm using shutter speeds as long as one second or more, I can STILL have camera shake from my finger actually pressing my shutter release button to take the photo! I like to avoid the chance of a blurry image by using my camera's self-timer. That way I can guarantee I won't be touching or moving my camera at all and the photo should be pretty sharp. There wasn't much light around the Arch de Triomphe, so when I pressed my shutter release to take an 8 second photo, I could notice my slight camera shake. I had to set a timer to get it perfectly sharp! 

  • Tip # 3 - Select a Higher f/stop Number 

In the shot below of the Piazza Navona, you'll notice my lights turn into fun star shapes!

Everything I photographed on my trip at night was some kind of cool structure or scene; I wanted to be sure as much as I could see would be in focus and sharp, and I love the star effect. A higher f/stop number will allow this to happen. I shot this one at f/22. I usually shoot between f/8-f/22 for photos like this. The higher your f/stop number means you will need MORE light, hence the long exposures caused by the need for a long shutter speed. You'll also notice that the shot captures some motion blur lines from the people who walked by my camera while I took this photo. I think it is kind of fun and adds the life of the scene!

Go out at night time and give long exposures a try! It's a lot of fun to take long exposures at night. As for me, I am still having dreams at night of the food, culture and life in both Rome and Paris... I miss it so much already but am so grateful for the opportunity we had to be in two incredible places! 


Intro to Shooting Backlit - 5 Tips for Beautiful Backlit Photos

When I was interning with the lovely Rebekah Westover, it was always humorous to see how many people wondered why she was shooting into the sun; clients thought that the sun should be on them, not behind them. They would ask, "Won't we all be dark?" The answer is... you will LOVE what is about to happen! Just you wait and see! Rebekah then continued to work her magic to produce stunningly gorgeous images for her happy clients, like these images of hers below.

Have you seen those beautiful, naturally-lit portraits where the light adds a perfect warm glow behind the subject? The secret is to shoot backlit! When your subject has the sun on their faces, its harsh lighting and nobody likes to try and smile with the sun in their eyes. Shooting into the sun, even if it's bright outside, helps avoid this AND can make for stunning results. 

Check out my tips for getting great photos by shooting INTO the sun. 

Here are my 5 tips for shooting backlit!

1. Shoot in manual mode. It's SO tough to get the right exposure (or that dreamy glowing feel) when you're shooting on a subject on auto, with the sun behind them. Your camera will try and calculate for the bright, bright sun and your subject and your image will most likely turn out too dark. 

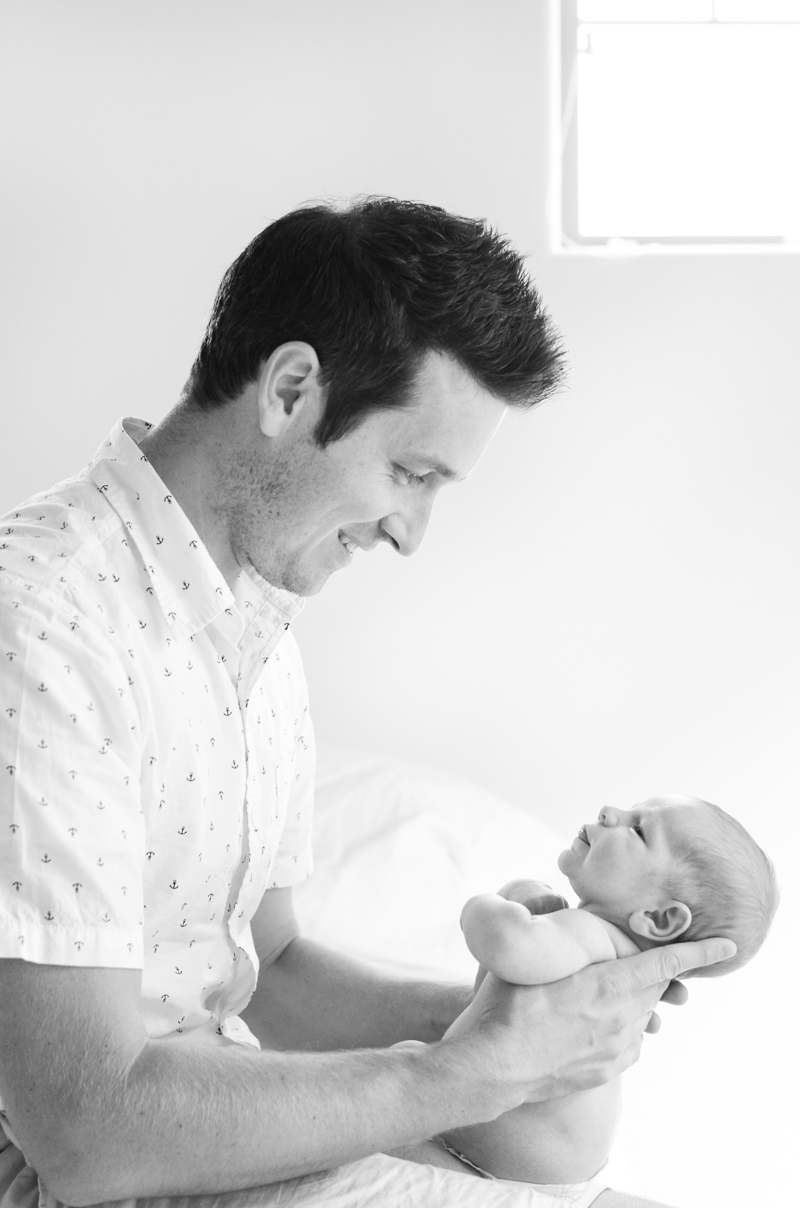
2. Spot-meter your subject. This will help you get the best exposure for your subject, not the contrasting values of your scene. You want your subject to be well exposed, and sometimes your background will go overexposed, but it will still be beautiful. For more about spot-metering and metering modes, click here. I also love shooting backlit indoors (shooting into the window light), like the photo below.

3. Use a lens-hood! When you have all that light coming into your lens, it helps to get more contrast with a lens hood; this can also help you to get just the right sun flares. Sun flare in certain photos can definitely add a great element but for some photos, it can block your subject too much or be overpowering. With a lens hood, even moving an inch can help you get the right look. 

4. Use a custom white-balance setting. I love cutting down my post-processing steps by shooting in Kelvin. I get to add a warmer temperature in-camera to get the right glow that I want to go for! Shooting on an auto-white balance setting isn't bad, but most of the time my images come out cooler than I'd like them to be. You can also shoot on the daylight setting, which might be warmer than your auto setting. Play around with your white balance settings to see what you like best! Read more about understanding white balance in my article here.

5. Try and find the perfect lighting, just before the sun sets, and see if you can get rim light to show around your subject. This is where you can see the outline of light around the subject. I love this look!

Shooting into the light or into the sun is my favorite way to shoot. I love how it creates such a beautiful glow around any subject! Practice shooting this way and I can promise you, you won't want to go back :)  


Printable Photography Cheat Sheet

Let's take a break from editing tips and get back to some basics! Today I made a really convenient printable photography cheat sheet for those wanting a little guide that can fit inside your camera bag! This is a 3x5 card that you can carry and refer to easily on the go. When you want to know what settings to use in certain situations, just snag your card to help you remember what all those crazy settings will do to your image. It can be easy!

Keep practicing shooting manual, or choose your aperture priority to practice selecting your own aperture. That's always a good place to start; you only have to think about half of the equation because your camera will choose your shutter speed for you!

Click here for the full 3x5 file. 


Behind the Scenes - In-Home Lifestyle Family Session

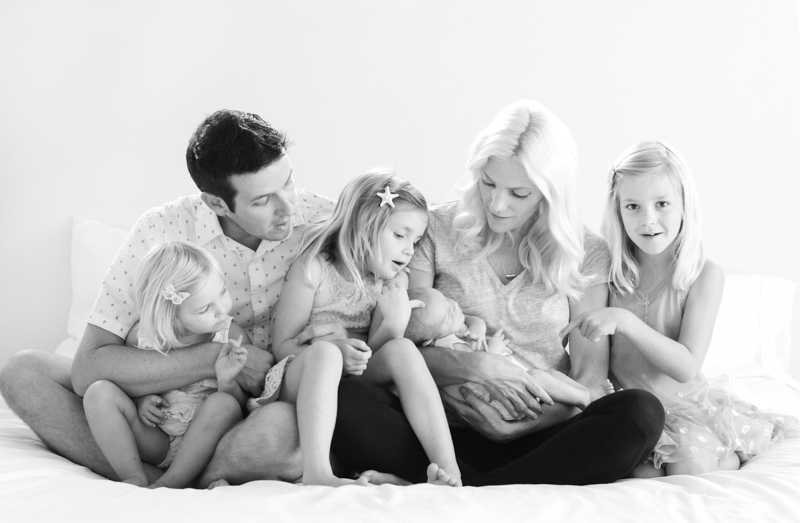
My wonderful brother and sister in law just moved to Arizona and I had the privilege of staying with them, just a few days after they had moved in! We had little to work with, as the rest of their belongings were being shipped across the Pacific Ocean from Hawaii. We really made this session simple and only used a bed, a sheet and a few white pillows for an in-home, lifestyle family photoshoot. Today I'm going to take you behind the scenes and give you some simple tips to get great photos in the home. 

1. Don't over complicate things!

Sometimes it's so easy to get crazy with props, outfits, blankets, and accessories. I think some photos become more about all those extra things, rather than focusing on the people in the photo. I love keeping things simple, clean and natural.  

hatchfamily-13.jpg

2. If there is a baby, make sure the baby is warm and well fed - that applies to the other kids too!

Crankiness and crying bring red faces and a lot of wiggles. Having the baby fed before hand helps a lot; I also had small easy snacks close by for the kids. It felt more like jumping on the bed, having a snack and snuggling than a photoshoot. Happy kids = happy photos. Simple as that. 

In-Home Lifestyle Tips
In-Home Family Lifestyle Photos - Tips for Keeping it Simple - www.mommatography.com


3. Allow for enough time to shoot and don't rush things. 

I loved being able to spend some quality time with this cute family and not have to rush things. In almost all of my sessions that involve a newborn, we'll have to take little breaks for nursing, calming the baby, or even making sure the older siblings are cheerful and happy. If it feels rushed it will be stressful and the pictures will show it! 

In-Home Lifestyle Family Photography Session - Behind the Scenes & Tips for Great Photos at Home - www.mommatography.com
in home family photos
In-Home Family Lifestyle Photos - Tips for Keeping it Simple - www.mommatography.com

4. Let the family be natural; don't stage everything or over-pose (I might have made that phrase up, but it sounds good to me). 

All I did for this shoot was tell them how to sit on the bed for the group shot. Everything else was candid and those are some of my favorite photos. Even if things get ugly with tears and meltdowns, it's okay to snap a few photos. Let them be their true every-day selves. It's real life. 

In-Home Lifestyle Family Photography Session - Behind the Scenes & Tips for Great Photos at Home - www.mommatography.com
In-Home Family Lifestyle Photos - Tips for Keeping it Simple - www.mommatography.com

5. Don't ever tell the kids to smile. Just make them laugh.

You know what I'm talking about. You say 'Okay, now SMILE!' and you get the world's most forced and irritated happy face. I steer clear of that. I tell them stories, make jokes and try to keep it light hearted. For these family shots, I played peek-a-boo behind the bathroom wall and that's all I needed to get happy expressions. It turned into a fun game for the girls. Okay, I might have done some really silly dancing as well; whatever it takes for million-dollar smiles, right??

In-Home Family Lifestyle Photos - Tips for Keeping it Simple - www.mommatography.com

6. Try and be discrete. 

I love standing by, trying not to let the kids know I am taking pictures. If you are documenting more than directing, you can get really great moments and the kids aren't bugged that a big annoying camera is in their face. This was my favorite shot of the whole day; the littlest sister jealously looking on at the new center of attention. She is the cutest thing. I wanted to take her home with me. 

In-Home Family Lifestyle Photos - Tips for Keeping it Simple - www.mommatography.com

7. Find the room that has the most natural-light.

Lighting is key to great photos. I always search for the best-lit room and let all that beautiful light flood in. If the master bedroom is dark, try moving to the living room if it has bigger windows. Shoot in different directions, towards the light source and letting the light fall on the subject. The quicker you learn about lighting and how to find good lighting, the better your pictures will be! 

In-Home Family Lifestyle Photos - Tips for Keeping it Simple - www.mommatography.com

Practice taking lifestyle photos at home with your own kids or ask friends, if you'd like to take better family photos. What better place to shoot than where a family is most comfortable - in their own home. 


Feature Friday - Andy Earl

My name is Andy Earl and I grew up here in the Wasatch. I work for Goal Zero managing content, social media, in-house photo and creative writing. I have been there about two years. My parents got us into skiing at a young age which started me on the path towards a bit of an obsession with the mountains. I met my wife, Neena, on the chairlift at Park City and we have been married for about five years. We had a little girl named Indira two years ago who was stillborn at full term and we now have an 8 month old little boy named Coen. 

1. What led you to pursue photography? 

I have always been into documenting things. It started with making snowboard videos in high school and then eventually led me to a degree in journalism. Photography was a way to support my writing but now it is kind of the other way around. I actually stole my wife's camera while we were dating and that kind of spurred all things photo for me. 

Friday Feature - Andy Earl - www.mommatography.com

2. What camera are you shooting with, and do you have a favorite lens?

I shoot a lot with the Canon 5D mark III and the 7D mark II. Man... favorite lens depends on what I am shooting. A lot of times, because I am doing long days in the mountains I have to make decisions on weight. Sometimes I can only afford to bring one lens and that usually is the most versatile, which for me is the f/2.8 24-70mm. I have also been really into the 14mm lately though. It is such a fun lens! 

Friday Feature - Andy Earl - www.mommatography.com

3. How do you prepare to shoot in varying outdoor conditions? 

I always have a big lens cloth on hand to deal with moisture, but most of it is just trusting that my camera can handle some snow and rain. So far I haven't had a problem and I have shot in temps as low as -13°F, countless snow storms and a few rainy days. 

Friday Feature - Andy Earl - www.mommatography.com

4. What is your favorite subject to photograph?

I like shooting people who are pushing themselves to do really difficult things in really beautiful places. I think a little suffering in a beautiful place make for an awesome story to tell visually.

Friday Feature - Andy Earl - www.mommatography.com

5. What are a few tips you might have for those wanting to shoot landscapes or outdoor lifestyle shots?

  • If you are on the move, keep your camera super handy. I carry mine in a chest pack typically, so I can capture moments and people as they happen rather than having to stage things. 

  • Be willing to take your equipment to places that other people aren't. A photo becomes more important to you personally when you have a bit of a story, and maybe a little suffering, to go along with it. 

  • Focus on the equipment you have rather than the equipment you don't. Sometimes it is really easy to think about a shot that I could get if I had brought a different lens, or this or that, rather than focusing on nailing the shot and moment I am in. You also never know what the weather is going to do; I had a moment up on Timpanogos last year where the clouds closed in and I thought the opportunity to take photos was over; turns out that the clouds made for some really unique photos. 

Friday Feature - Andy Earl - www.mommatography.com

6. When did you start sketching?  

I have been into drawing my whole life. As a kid I would go through reams of paper and make giant crazy messes. I hadn't picked up a pen in a long time but I got inspired on afternoon to pick it back up. I kind of drew inspiration from a few artists like Renan Ozturk, Jim Harris and Jeremy Collins. I haven't really stopped drawing since. 

Friday Feature - Andy Earl - www.mommatography.com

To see more of Andy's work, follow him on Instagram at @wasatchandy. His sketches are available for purchase at his website, Andy Earl Creative