popular posts

Travel Photo Tips - Rome and Paris

Get ready for photo overload! As promised, today's post is all about my trip to Europe. I hope you enjoy it and can learn a few useful tips for getting the photos you want when you are traveling. I'll also discuss how I balance shooting with my phone vs. my camera. 

I photographed my trip with three different cameras: my trusty iPhone 6s, my Nikon d7000 and my absolute favorite, a medium format film camera called the Hasselblad 500 c/m. Let's get one thing straight about me; I absolutely LOVE film. I used Kodak Portra 400 for the photos below. Unfortunately, purchasing and developing film can get expensive, and it is a more time consuming format when on-the-go, otherwise I probably would have easily shot 30 rolls on this trip! Here are a few of my favorites. 

Ponte Sant'Angelo - Bridge of Angels

Trajan Column & Heart of Rome

Colosseum Detail

Streets of Montmartre, France

Paris Street Artist

This is easily one of my favorite shots of my whole trip. This lady was so fun to talk to; I loved her accent, learning about her art background and techniques and hearing how her father also made a living as an artist in Montmartre before his old age. 

When shooting film, you have to be super careful to get the right composition, exposure and especially make sure you subject is in focus. I shot this at f/2.8 which was risky, but I really wanted the image to capture the essence of who she is. I didn't want any other faces to distract in the background, but you still see enough of the quaint streets and the majestic Sacre Coeur behind her. Luckily, I snapped it at the perfect moment when she had the expression I was hoping for. 


Moving on to some shots from my digital camera, I have to say that I LOVED having my wide angle lens for this trip! I use the Sigma 10-20mm lens which you can find here on Amazon. A wide angle helps so much when photographing landscapes, architecture and interiors. I was amazed at how much more I could get in my frame, especially when photographing inside cathedrals such as St. Peter's Basilica and Sainte-Chappel. It also allowed me to be close to a structure and still squeeze the majority of it in my frame. 

One thing to note is that many places you might visit are CROWDED! It is hard to get ideal photographs when there are literally hundreds, if not thousands of people in the way. I decided to embrace it and then get creative with my compositions in order to eliminate the distracting people. I honestly loved how in Rome, you'll turn a random street corner and HELLO! There's an incredible historic landmark right in the middle. So this photo of the Pantheon shows that reality. I might not frame it, but I want to remember how I felt when I first saw it. 

By walking closer and changing my composition, I'm able to get a good shot of just the Pantheon and nobody else in my frame. You don't have to settle; work around your scenario to get what you want! 

Remember when I mentioned THOUSANDS of people? It wasn't easy navigating our way down the Spanish Steps. A simple iPhone photo was fine enough here for me. 

It was fun to try and capture the culture and life in both Paris and Rome as well as photographing the main attractions. Look for details or side streets that catch your eye. I was also in love with the trees in Rome (see below). 

We walked through the Roman Forum (below) in the middle of the day when the sun was at its highest and harshest point. I decided to play around with my aperture and shot this at f/22 to tone the sun down. I then brightened the foreground of the image in post-processing in order to see more detail. If I exposed for the foreground here, my sky would have blown out to all white. Try and get off the auto setting and you can get some really fun results. 

Sainte-Chappel in Paris was easily my favorite cathedral. The 13th century stained-glass windows are absolutely breath-taking and are known as some of the best in the world! The entire structure is lined with fifteen huge panels; it's like a giant light box. 

The sun peeked through the clouds a few minutes after we walked in and completely changed the look and feel of the whole chapel. The light that flooded through brought the colors to life and the glow was amazing. I'll never forget it. Both of these photos were shot with my wide-angle Sigma lens; I didn't regret packing that one along that day. 

One huge benefit of carrying a DSLR on a trip is for photos at night. My iPhone images of this Eiffel Tower scene below are pretty much a laughing-matter. At night or in dark settings, phone photos can get so grainy and hardly hold any detail. It gets ten times worse if you try and zoom in at night. If you missed my previous post about my favorite travel tripod, the extremely small and affordable Pedco UltraPod II, check it out! I tried wrapping my little travel tripod around the fence at the top of the Arch de Triomphe but the fence wobbles too much to get a sharp long exposure. I had to reach through the fence and hold my camera by the strap (very risky, but I just couldn't resist!!) , and set the tripod on a ledge to get a steady surface for this shot. You just can't get this result with a phone camera.


Don't get me wrong, I love having an iPhone. So let's switch gears to my thoughts on iPhone photos! It was really nice to be able to tuck my camera away and make life easier by snapping a few iPhone photos whenever I wanted. It's light, fast and easy and for simple every-day memories, and for that, it does just fine. 

If you've followed my blog long enough, you will already know how much I love the panorama feature on the iPhone :) 

I also pair my iPhone with the app Snapseed to get better edited iPhone images. I highly recommend checking it out! Read my review of Snapseed here.

Well, that really is just a glimpse of what I saw while walking through the streets of Paris and Rome. Thanks for letting me get personal with this one, but I do hope I helped you get a step closer to getting better travel photos. Have a happy Friday and enjoy your weekend! 


Printable Photography Cheat Sheet

Let's take a break from editing tips and get back to some basics! Today I made a really convenient printable photography cheat sheet for those wanting a little guide that can fit inside your camera bag! This is a 3x5 card that you can carry and refer to easily on the go. When you want to know what settings to use in certain situations, just snag your card to help you remember what all those crazy settings will do to your image. It can be easy!

Keep practicing shooting manual, or choose your aperture priority to practice selecting your own aperture. That's always a good place to start; you only have to think about half of the equation because your camera will choose your shutter speed for you!

Click here for the full 3x5 file. 


Avocado, Tomato & Cayenne Melt

It's time to lighten things up with a good recipe. I hope the last few posts weren't information overload for you learning how to take sharper photos! So this week we're just going to have fun. I also have an awesome feature coming up on Friday so stay tuned!

This incredibly simple yet delicious open-faced sandwich came from my sweet Grandma, Nola Rae. My Grandma doesn't cook. Not even a little. She was known for always having gum balls, fireballs and candy bars in her purse. At night we'd snack on ice cream bars or frosted root beer floats in her den while watching an old classic movie or playing cards for hours. She tells everyone she never has to cook a day in her life; she's always been cooked for or stopped in at the family-owned restaurant in Mesa called Tia Rosa's. It is so good, I could eat there every day. Let's get back to the sandwich.

One summer while visiting, Grandma made us lunch in her little kitchen. I honestly have no idea where she came up with this idea, but my sisters and my mom and I were blown away by how much we loved it! It is SO easy to make, I almost always have these ingredients on hand and it's pretty healthy. I eat this multiple times a week for lunch. Thanks to my fun-loving Grandma even for just one recipe that I have already shared with many friends and family members. 

Avocado, Tomato and Cayenne Melts - Avocado, Tomato Sandwiches - www.mommatography.com

Avocado Tomato & Cayenne Melt

  • Slices of Bread (I LOVE using the thin-sliced Dave's Killer Bread from Costco)

  • A little mayo 

  • Cayenne pepper

  • Sliced tomatoes

  • Avocado slices

  • Sliced Cheese (I prefer extra-sharp cheddar, you can use any kind)

  • Salt & Pepper

Spread a thin layer of mayo on your bread. Sprinkle some cayenne pepper, depending on how much of a kick you like. If you're not a fan of things spicy, just do a pinch for flavor.  Layer avocado slices and top with 3-4 tomato slices. Sprinkle with salt and pepper and place slices of cheese over the top. Broil on high until the cheese is melted and bubbly, and the edges of the bread are slightly toasted. 

Avocado, Tomato and Cayenne Melts - Avocado, Tomato Sandwiches - www.mommatography.com

Try this using fresh garden tomatoes. It will knock your socks off!! These are just Roma tomatoes; I get so depressed when my tomato plants die and we have to buy them from the store again! 

Avocado, Tomato and Cayenne Melts - Avocado, Tomato Sandwiches - www.mommatography.com

Give them a try and I bet you'll be hooked like I am! 

Avocado, Tomato and Cayenne Melts - Avocado, Tomato Sandwiches - www.mommatography.com
 

Road to Sharp Images - Back Button Focusing!

Who is excited for more tips to get sharper photos?! If you missed my first two articles in this series, click here and then click here to catch up. I am going to talk about back button focusing today and how it is another pretty SWEET step towards taking sharper photos! This little trick can save you from just missing your sharp focal point, due to moving subjects. If you are trying to photograph still life subjects, this may not be a drastic improvement or technique for you. If you're like me, and take portraits of people, especially little people, this helps a TON. It is also very helpful for sports and wildlife photography. 

First let's explain how it works and why it is beneficial to use this feature. Back button focusing (BBF) can separate the Autofocus activation from the shutter release button. Normally, if we press the shutter release button half way, our camera will focus and then we take the photo by pressing it all the way. You can hold down the BBF button while a subject is moving and use the shutter button to capture the image at just the right moment; there's no need to keep pressing the shutter half way to get the shot you want! In a nutshell, your thumb can work the Autofocusing while your index finger only has to focus on taking the perfect shot.  By separating these two functions, we can also lock focus by pressing the BBF button and recompose our subject as many times as we need to (moving your subject to different sides of your frame, not having your subject move forward or backward). 

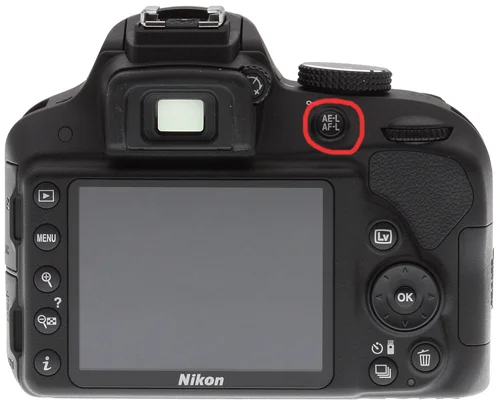
Now I will show you where we find this magic button, and how to set your camera up for back button focusing. Most higher end DSLRs come with an AF-ON button, dedicated entirely to back button focusing. If you don't have this button and you shoot with a Nikon, look for the AE-L/AF-L button. You'll have to set this button to act as your back button focus. Head to your MENU, and go under the pencil icon for your 'custom settings menu'. Go to 'controls' and select 'Assign AE-L/AF-L button'. Then choose 'AF-ON'. After this you'll have to tell your camera to take a photo even if the focus wasn't achieved. Go to 'custom settings menu' and choose 'autofocus'. Go to 'AF-C priority selection' and 'AF-S priority selection' and make sure they are both on 'release'. Your back button focus should be set to go!

Back Button Focusing for Sharper Images - www.mommatography.com

On Canon cameras, your back button focusing button will either be the AF-ON or AE-LOCK (marked by an *) button. If you don't have an AF-ON button, you'll also have to set your * button to tell it what to do. On a Canon Custom Function menu, look for a 'Shutter/AE Lock button'. In this menu you'll probably look for a 'Metering Start/Meter + AF start' (no that doesn't make any sense but that's what they named it)! There are different ways for setting this correctly, depending on which model you have. I recommend checking your manual for exact instructions. It is also important to remember that this only works when shooting in a Creative Mode, not on an Auto mode. 

Back Button Focusing for Sharper Images - www.mommatography.com

Here's a scenario where BBF would be very helpful to achieve sharp focus. 

Back Button Focusing for Sharper Images - www.mommatography.com

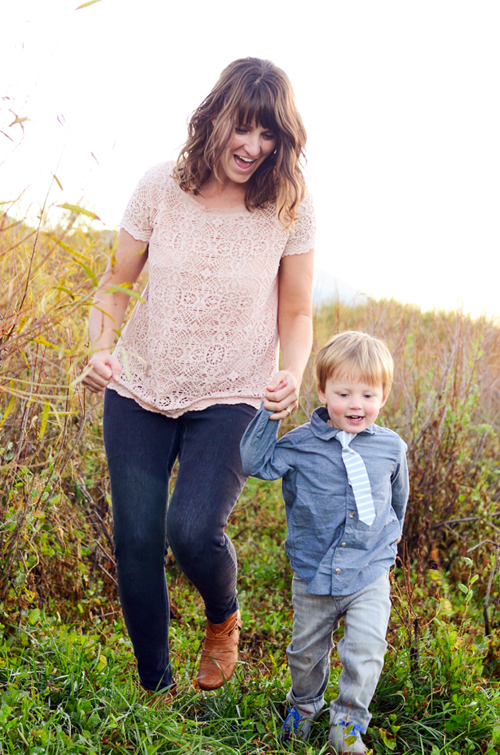
In this scenario, my subjects are moving towards me. If I were to press my shutter half way to focus, in even a fraction of a second they will move closer to me; this would cause them to be out of focus. Even if they are slightly out of focus, our goal is to have SHARP images. BBF allows me to focus separately, freeing up my shutter to take the photo right at the exact moment I want to. For moving subjects, it is helpful to shoot on a Dynamic mode such as AF-C (Nikon) or Ai-Servo (Canon) while back button focusing on a moving subject. In this case, you'll keep your thumb pressing the BBF button and let your camera track your moving subject while you press the shutter at the right moment. 

If you want to shoot a self-portrait or use a timer/remote, you can simply press the BBF button once to lock the focus and when the shutter is released, your focus won't change. BBF can definitely make photographing certain scenarios more simple.   

Give back button focusing a try! It might take a few days to practice and get the hang of it, but I promise it can be a game changer for you like it is for me. 

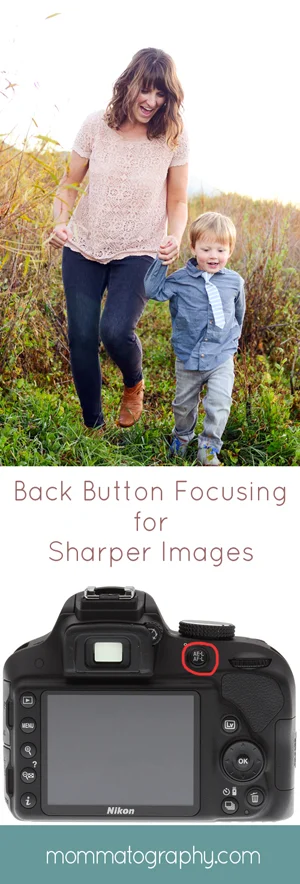
PIN THIS TIP FOR YOUR FRIENDS!

Back Button Focusing for Sharper Images - www.mommatography.com
 

Metering Modes Explained

As a follow up to my previous post, Understanding Your Light Meter, I am going to go over Metering Modes! Metering will evaluate the amount of light and dark areas in your image and help you get the correct exposure for your subject. 

Your DSLR camera is equipped with a few different modes that will measure and determine how to get the best exposure, based on which setting you choose. Learning how to choose which part of your scene is most important and getting an accurate exposure for your subject will help you have more creative control with your photography!

The most common metering modes include:

1. Spot Metering

2. Center-Weighted Metering

3. Matrix (or Evaluative) Metering

SPOT METERING

Spot metering allows the photographer to choose the exact spot in your frame you want to expose for (using your selected focus point). This is a very accurate way to meter, but the area is very small so you have to be precise about what you want the camera to meter from your scene. This mode is awesome when your main subject, or your focal point, is a lot brighter or darker than the rest of the surroundings! It is also great for subjects that are backlit. I love that I can use this mode to meter subjects that are off-center, using a manually selected focus point. 

PARTIAL METERING (CANON)

Partial metering works the same way spot metering works, but the size of the area is a little larger. 

CENTER-WEIGHTED METERING

This mode allows for a larger metering area, which is fixed in the center of the frame. Although it takes a little information from the edges of your frame into account for the exposure, the priority is given to the center of your viewfinder. It is helpful for scenes where you want to expose for a subject in the middle of the frame, not worrying too much about the lighting behind or around your subject matter. Think of it as a mode that falls in-between evaluative and spot metering. On some cameras you can choose how large you want this area to be. Check your camera's manual for more information about how to change the settings.

EVALUATIVE/MATRIX METERING

This mode is considered a 'default' or 'auto' mode. This will measure the light in the entire frame of your camera's viewfinder and determine the average exposure for your scene. This mode works well when the scene you are photographing is evenly-lit. It is also helpful for landscapes. 

Here's a cheat sheet to know what the metering mode icons look like on your camera. Changing your metering mode is different for every camera; refer to your manual if you need help changing your setting.

Metering Modes Explained - www.mommatography.com

This will also help you visualize what each metering mode covers in your viewfinder. 

Metering Modes Explained - www.mommatography.com

source

I personally use spot metering most frequently. This gives me full control of focusing and metering for my subject and I find that it works the best for me! Try shooting the same scene using each metering mode and see if you can notice the difference.

Keep in mind that your camera does the best it can to average light and dark and some images STILL might be darker or brighter than you'd like them to be. This is where exposure compensation can come in handy, and we will cover that on Thursday!