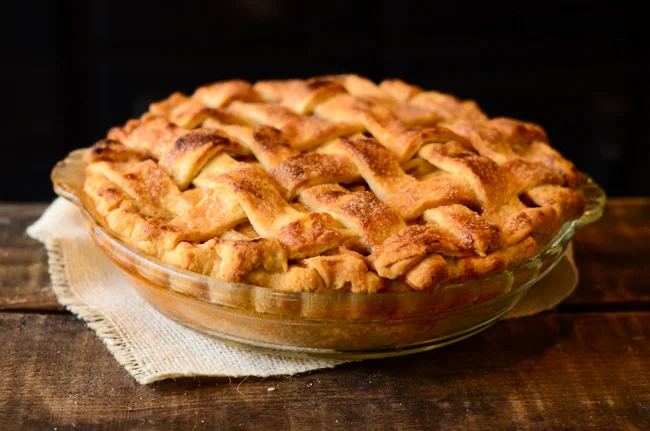
For thanksgiving this year I made three pies; the most I've ever made all at once. My Granddad is famous for his pie making skills and my Dad has carried on the tradition. I have a lot to live up to in the pie world, but I love making them and they are easily one of my favorite desserts!
When I want to photograph food, I think first about what I want my surface to be and what kind of background or backdrop I want in my photo; getting these right will compliment the subject matter. You could say I'm more of a minimalist when I shoot; I start with the key parts of my photo and selectively add a few props in as I go. I shot these using only natural light, with a wooden box as my table and my sweet mother in law holding the backdrop behind me. I'll include what settings I used which hopefully will be helpful for you.
F/2.8, 1/100, ISO 3200
F/2.8, 1/100, ISO 3200 For the rest of the images I used F/2.8, 1/125, ISO 2500
Watch my Facebook page (like us if you haven't already!) and instagram (@mommatography) for my favorite Apple Pie recipe on an upcoming feature! It's amazing, if you can't tell from that glaze.
Make sure you are aware of your lighting when photographing. For the photo on the left, the tungsten lights in my kitchen were on. Shooting with the lights on will make your photos warmer since the tungsten light is more yellow. Mixed lighting can make it hard to get your white balance to look good. I turned the lights off for the photo on the right and just used the natural light from my door. I prefer just using natural light in most cases; it's not as harsh and the tungsten light made my pies way too orange. I use my Kelvin scale to set my white balance; we will cover more about white balance soon.
For this image below I actually liked the warmer tones from having my lights on. It made it look a little more golden, and who doesn't want to dive into a pie that is perfectly golden brown with a sugar glazed crust! I shot all of these using my 50mm f/1.8 lens. I love this lens for food photography.
Play around with different color themes, textures and props. For this pie I just used a piece of burlap underneath it. Sometimes your closest thrift store is the best place to look for props; old pans, colorful dishes and plates, vintage forks and knives, towels and placemats. I love searching for new props. Antique stores are great too. Notice the difference my background makes in both of these photos below; one is light and makes a nice bright scene and the dark one really draws the focus in on the pie. I like both of them, but the mood is completely different. Check back soon for products & supplies I recommend for shooting food, products and portraits at home.
My Recipe & Tips for the Perfect Pie Crust:
1 1/2 cups all-purpose flour
1/4 tsp salt
1/2 c. and 2 TBS butter (very cold)
1/4 c. and 2 TBS ice water
In a mixing bowl, combine the flour and the salt. Use a knife to dice up the chilled butter, then using a pastry cutter, cut the butter into the flour until it resembles coarse crumbs. Add the ice water one tablespoon at a time, being careful not to get the dough too wet. Continue this process until it forms a ball. With pie crust, it's important not to overwork the dough (like kneading bread dough). You want the bits of butter to stay cold. Refrigerating the dough for a few hours or over night will help when rolling and shaping your pie crust. Allow the crust to sit out from the fridge for at least 30 minutes before rolling, or it's tough to roll out. I roll my dough once, fold in the edges to form a ball and then roll it out again to make a perfect circle.
Use your rolling pin to roll the pie crust up and place it easily in your pie pan. I then fold over the lip of the crust along the edges to make it thicker, and (see the images above) using my knuckle, shape the crimps into the crust.
Recipe adapted from here.


