Light Meter

Understanding Your Camera's Light Meter

Let's take it back to the basics and remember our three keys to making a good exposure: aperture, shutter speed and ISO. It is pretty complicated to look at a scene with just our eyes and determine what our exposure should be; what these settings need to be to make an image that is balanced as far as lighting is concerned. Luckily, we don't have to guess how to make a great exposure; we have an amazing tool built into our cameras to help us figure it all out - the light meter!

Cameras have built-in metering points that read the intensity of light throughout your scene. Light is recorded through your lens (TTL) to your sensor and your camera translates what your exposure will look like on your light meter. When you shoot on Auto, pressing the shutter release button half way determines the best exposure reading for that scene. You can choose your exposure by shooting in one of the creative modes (such as Manual, Aperture Priority or Shutter Priority). This is where using your exposure meter is crucial - it will tell you when you are in the ballpark of having a well-exposed image.

Your built-in light meter looks something like this:  

Understanding Your Exposure Meter - www.mommatography.com

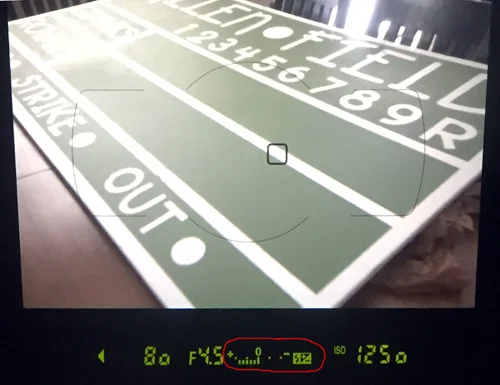
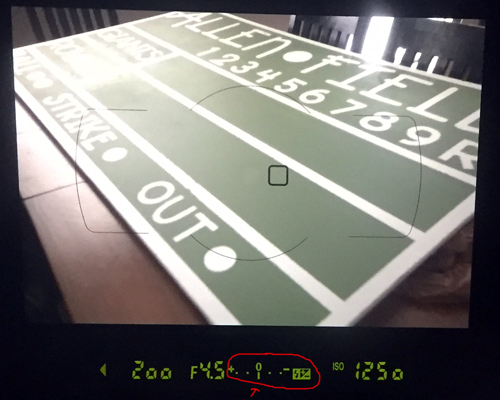
You can see this when looking through your viewfinder, and on some cameras you can also see it on your LCD screen. When the tick mark (see red arrow) is lined up in the middle, your camera is telling you it is a good exposure. If these tick marks line up towards the positive numbers, your image will be too bright (overexposed). If they line up below the negative numbers, your image will be too dark (underexposed).

In these images below, you will see the light meter through my viewfinder. This image would be too bright. My ISO number is pretty high, letting in a lot of light. Think (+) as too much light.

Understanding Your Exposure Meter - Overexposed - www.mommatography.com

This image below would be too dark. I dropped my ISO to 125, which will make my image very dark. Think (-) as not enough light.

Understanding Your Exposure Meter - Underexposed - www.mommatography.com

When my tick marks line up with 0, I'll have a good exposure. I changed my shutter speed and my ISO to get the right combination. 

Understanding Your Exposure Meter - Good Exposure - www.mommatography.com

Remember that your camera is giving you it's best opinion; it won't always be perfect. Sometimes your image will be a little too dark or too bright even if your meter is lined up at 0 (like my example in my previous post, tips for shooting in the snow). Use your meter as a reference point and then determine whether you need to make it brighter or darker. I tend to overexpose one or two stops in a lot of scenarios. 

Switch your camera to Manual Mode to practice and watch the arrow on your exposure meter change. Try to get a combination of your aperture, shutter speed and ISO that will place your arrow closest to the middle of your exposure meter. If you want a blurry background, keep your f/stop number low and change your ISO and shutter speed until you get a good exposure. If you need a fast shutter speed to freeze motion but your image is dark, try a lower f/stop number or a higher ISO to let in more light. See how the settings work together to give you the best exposure! Practice, practice, practice!